Whether it is a grey and rainy day or a day with lots of scattering light that makes an image appear with low contrast, you can easily fix the problem with the histogram and the Levels sliders in the Levels tool.
Pictures with low contrast hardly ever look interesting. Even if an image was shot in very low contrast, you should still try to use a full range of tones in the image.
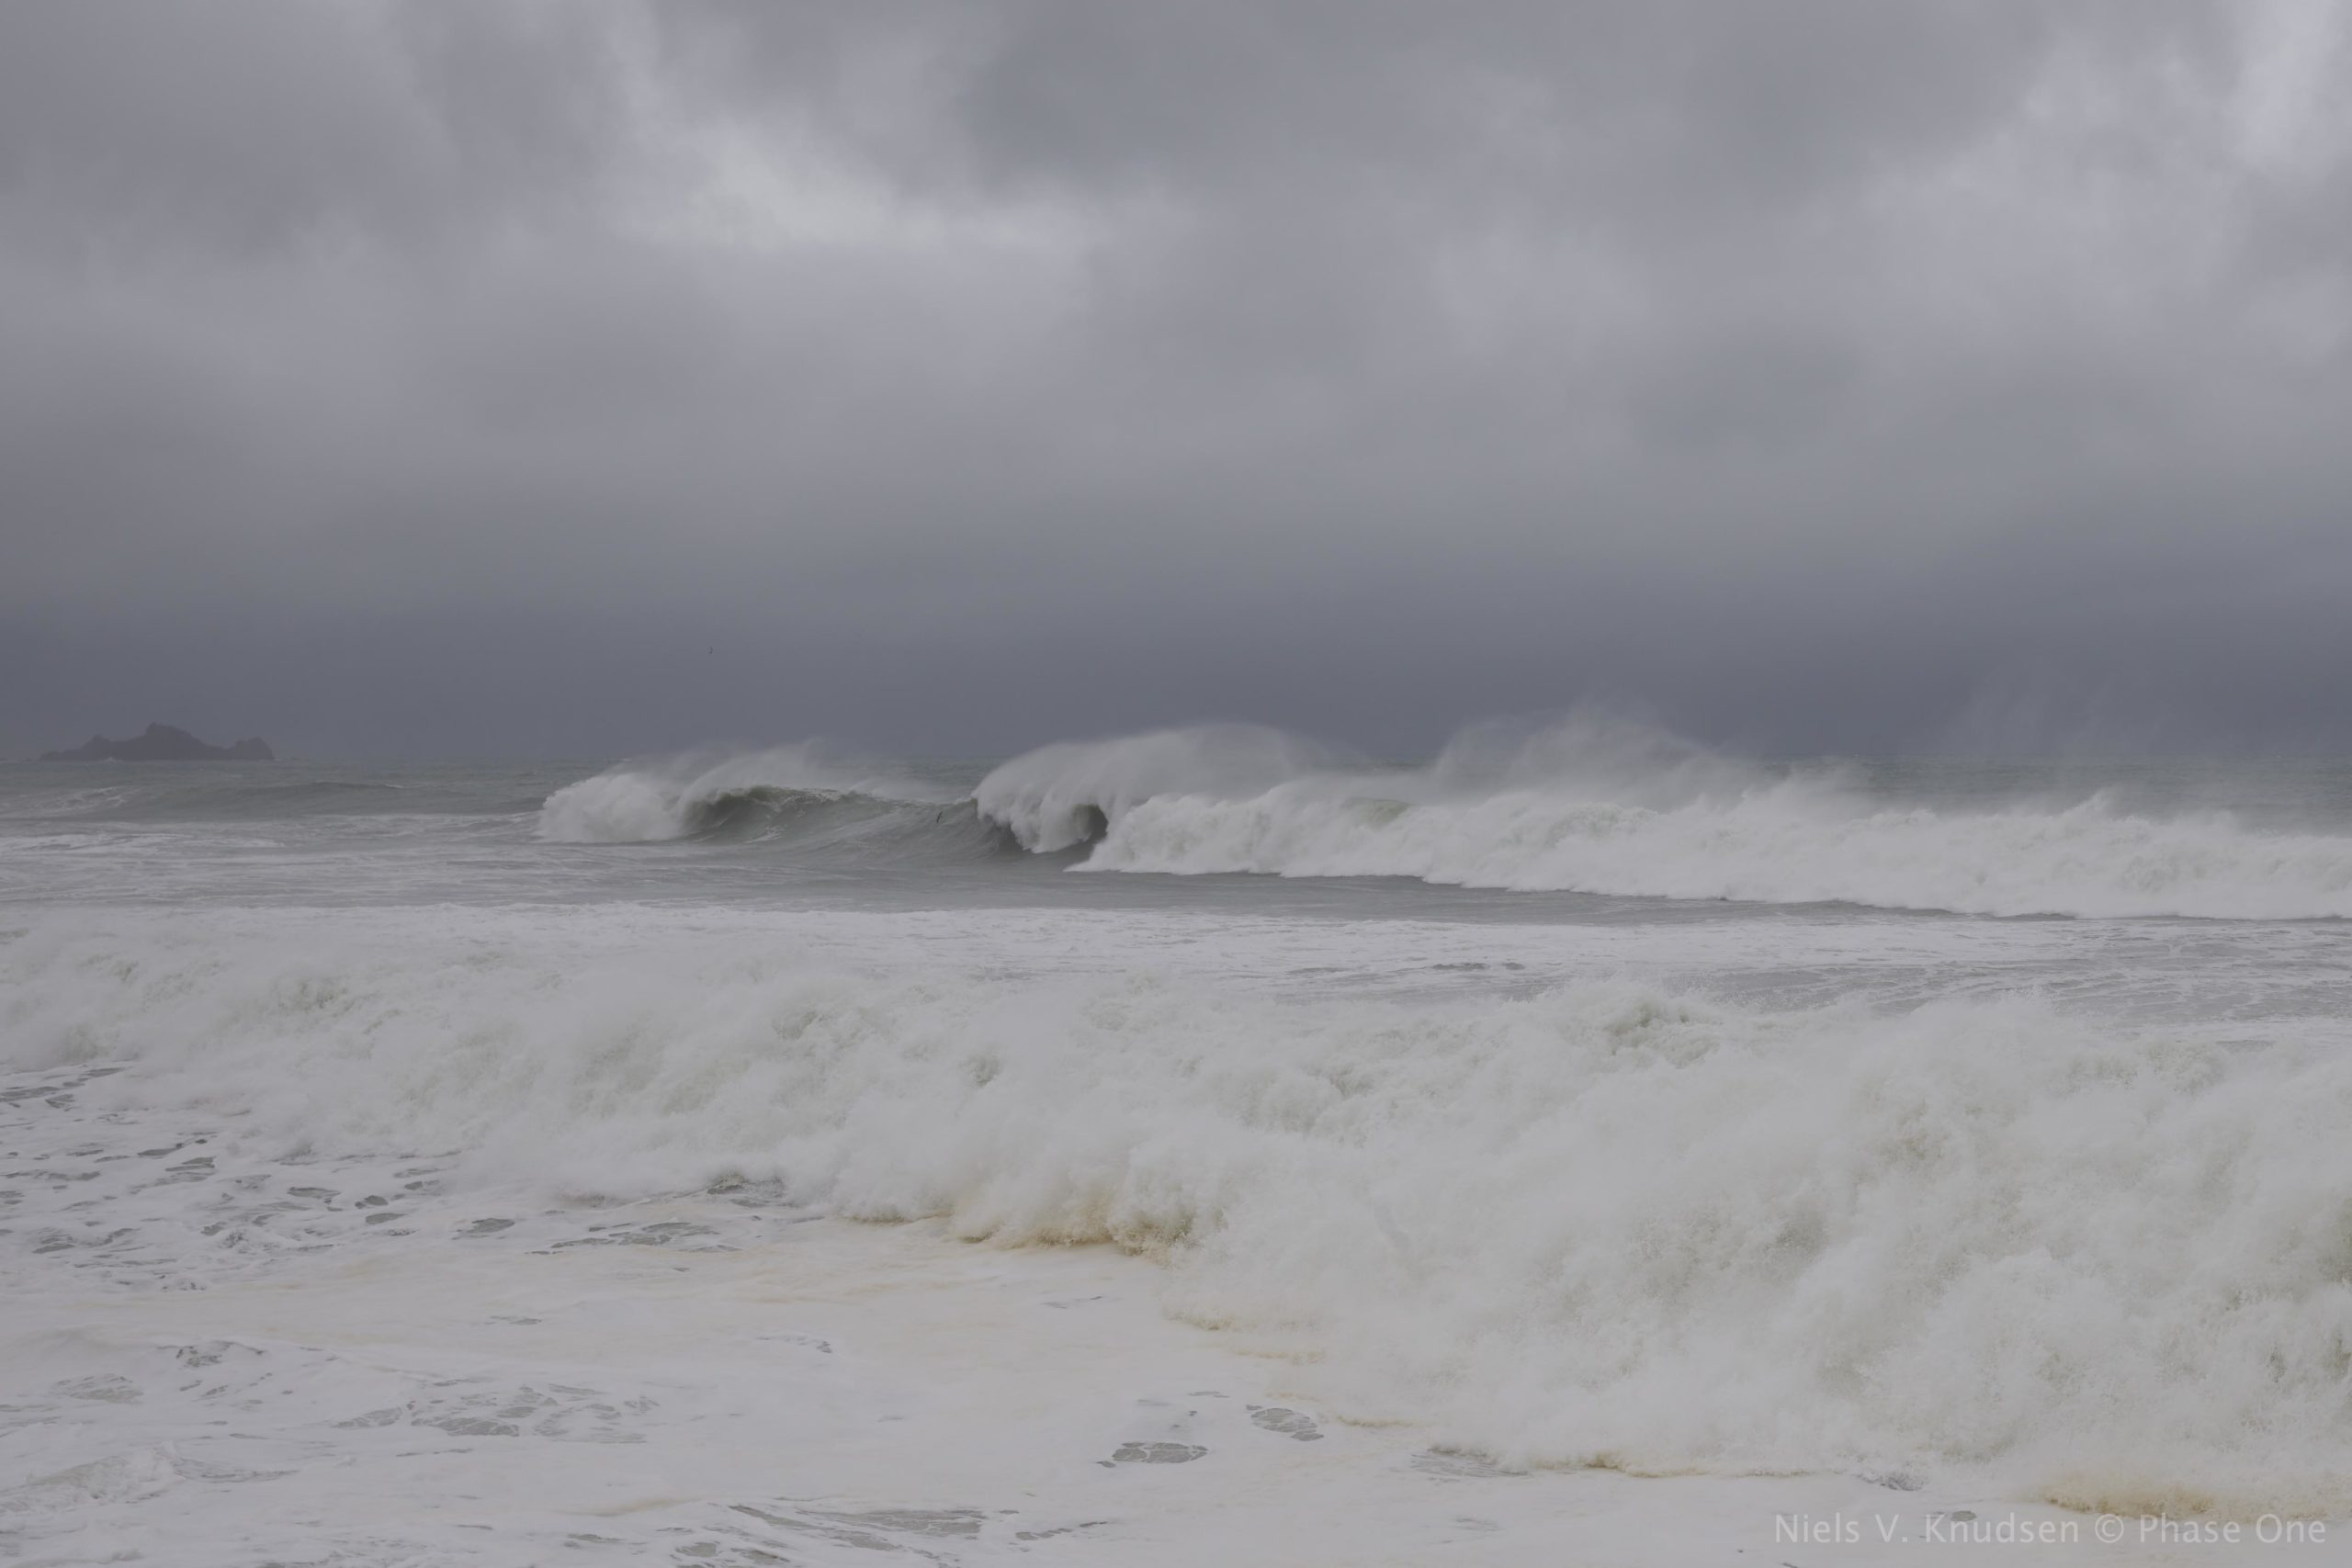
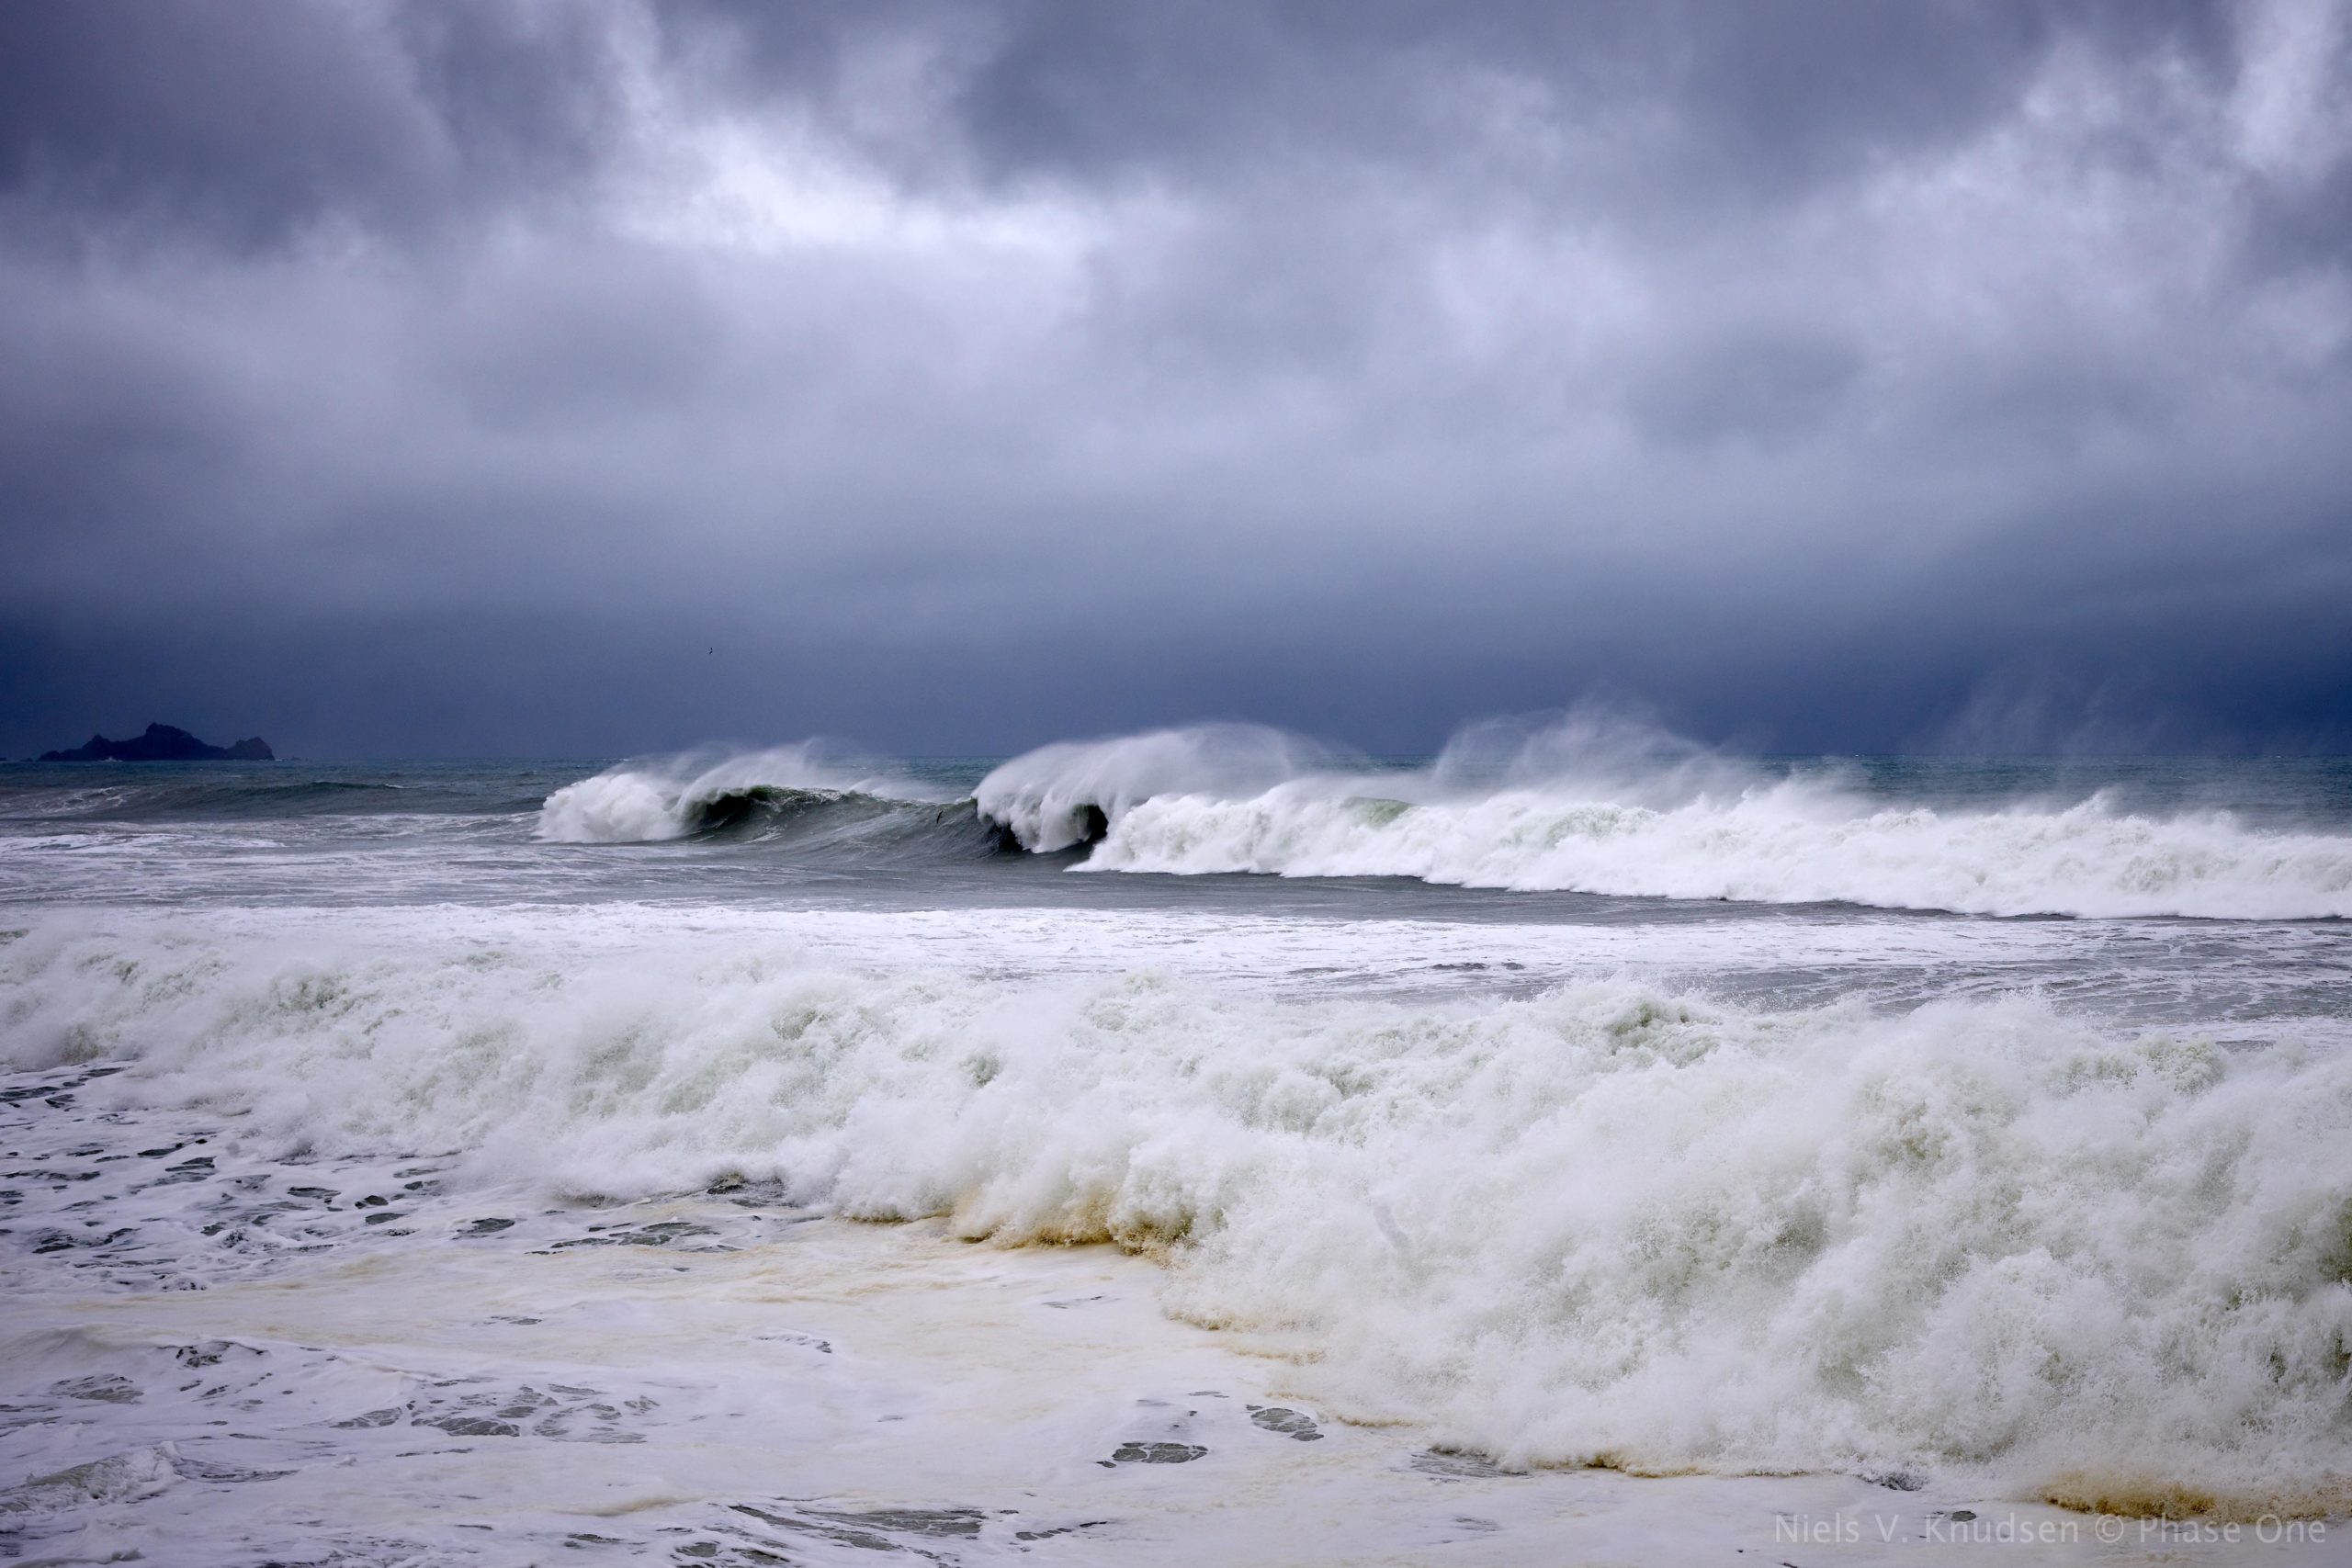
Image straight out of the camera and the image after being optimized in Capture One Pro 9.
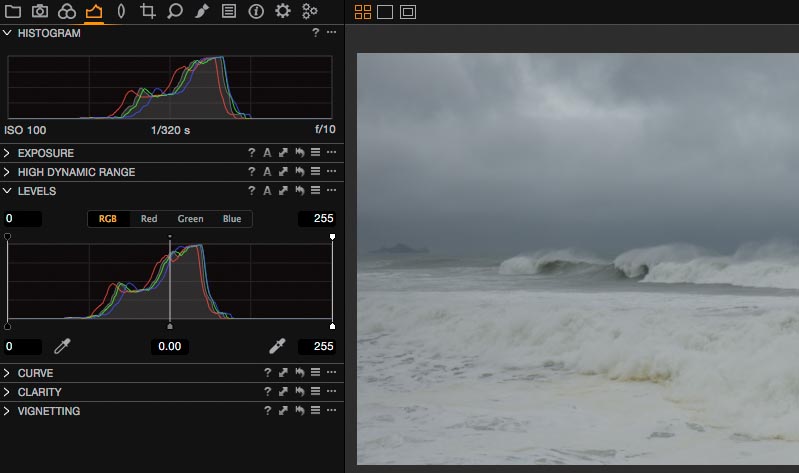
After loading the image in Capture One Pro 9, it is obvious that the image looks very dull lacking both contrast and colors. When I took the image, my brain had compensated for the very low contrast light conditions, so I remembered the scene having more colors and contrast even though the weather was really rough.
The histogram in the Levels tool explains why the image appears so flat. All the values in the image are gathered in the middle of the histogram without any really dark or bright tones.
Step 1: Fine-tune the White Balance
I notice that the red, green and blue histograms aren’t really on top of each other indicating that it is a good idea to adjust the White Balance in the image. I use the white balance picker in the splashing water as this diffuses the light and gives a good general balance for the whole image.
I don’t use the picker on the clouds as this will lead to a wrong White Balance for the image. Distant clouds always get a bluish tone, which I like to preserve in most landscape images.
Step 2: Optimizing the histogram
Now I simply drag the shadow and highlight slider in in the Levels tool so they are placed where the main mass of the histogram starts and ends. You could also use the A button in the tool for Automatic optimization for the histogram.
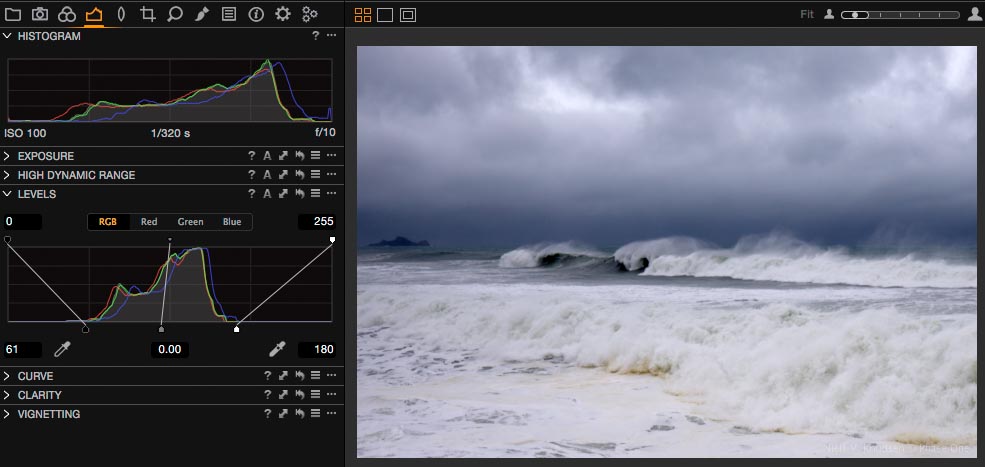 Optimized histogram in the Levels tool
Now the image looks much better. But I would like to do a few more things to enhance it even more.
Step 3: Adding more details in the splash
To get more detail in the white splashing water I will do a combination of some corrections in the High Dynamic Range tool combined with some Clarity and Saturation adjustments. By first using the highlight slider in the High Dynamic Range tool I bring more details into the splash, which I can amplify by adding some Clarity and Structure in the Clarity tool.
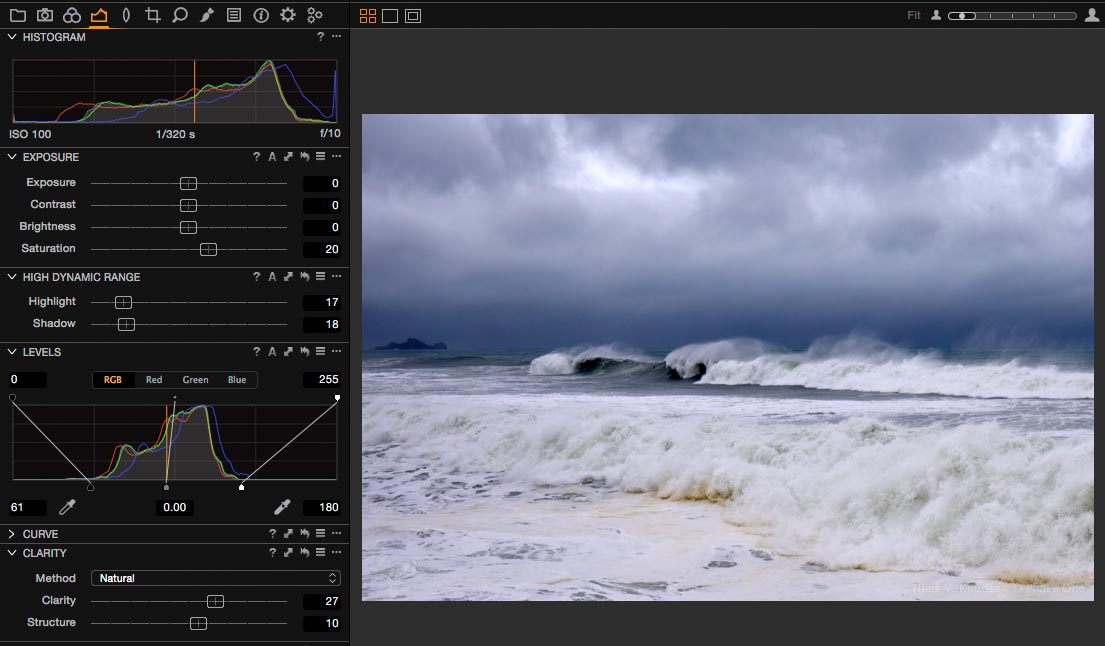 Saturation, Highlight and Shadow compensation in the High Dynamic Range tool and Clarity has been added. Now it is much easier to see the patterns in the white splashing water, which is better separated from the now more bluish sky.
Step 4: Darker skies
Finally, I would like to add more drama to the sky. I will do this very simply by applying some Vignetting to the image. Besides adding drama, it also helps drawing the viewer’s attention towards the breaking wave in the center of the image.
When adding Vignetting I compensate with a little extra brightness and contrast to ensure the same overall brightness of the image.
 Final image after being adjusted in Capture One Pro 9
Step 5: Watch the noise in the image
When you stretch the data as much as I have done in this example, it is a good idea to take a look at the file in 100% zoom rate to see if you need to fine-tune the noise settings. On a normally exposed image Capture One Pro 9 will automatically make sure that the noise settings are set correctly but in a case like this you may have to add a little extra Color Noise or Luminance Noise Reduction.
All the best,
Niels

The Image Quality Professor
The digital pioneer, Niels V. Knudsen, is Phase One’s Image Quality Professor and founder of the IQP blog. Moreover, he is responsible for breakthrough advancements in image quality both in Phase One’s medium format camera systems and in Capture One Pro.


Thank you as always for some great tips and very clearly presented… 🙂
HI Richard,
Thank you for the kind words. Happy you enjoy the tips.
All the best,
Niels
Easy and effective, yet not overcooked.
Thank you for the advice
Thank you, Christer. Glad you liked it.
All the best,
Niels
This kind of straightforward, basic example is very welcome. Please continue to provide these beginner examples. The webinars and professional photographers go too deeply into details and tend to ignore the simple fixes.
Absolutely agree – this is a great tip that anyone can use.
Hi both,
I will keep that in mind. Thanks for your feedback and glad you enjoyed the tip.
All the best,
Niels
I have used a similar process on snow carvings against a snow wall shot at one of our winter festivals to good effect, I will however revisit these images as I did not follow the same process and did not see the effect of adjusting saturation.
Thanks for the insite.
Hi William,
You are welcome! Happy that the tip was useful
All the best,
Niels
Thanks very much for this full article. I have a number of flat black images I want to convert to black-and-white and I suspect your tutorial will help quite a bit.
Thanks again!
Happy to hear. Thanks for your feedback, Tom
I could not believe it is possible. But I tried and … Thank you very much PhaseOne
Thank you, Ratko. Glad you liked the tip
Pleasure to meet your team in London earlier this year. And thank you for sharing how you process this image in Capture One Pro 9.
Thanks a lot for your feedback, Glyn. Happy to hear that you enjoy the tips
Great tips, and I like the before/after comparison! 😉
Thank you, Paul. I think the new plugin works very well too;)
I’m new to the program and it’s absolutely blowing me away. Tips like this are extremely helpful. Thanks very much indeed!
Hello, It would be nice to have the original “dull” picture available for download in the articles like this so that we could try the procedure by ourselves and learn the tools by doing so.
regards
Andrej
Thanks, really.
Hi,
Why isn’t my Kelvin in Cap1 the same as set on my camera when I’m using “as shot”?
Hi John,
It really depends on which camera model, you are using. For some cameras we get precise details and for others it is determined by estimates from the White Balance game factors.
All the best,
Niels
Great tips, thanks.
My additional questions is likely to out me as a beginner, but where and how do I “add a little extra Color Noise or Luminance Noise Reduction”?
Best,
Arne