How to Capture an Interior Space and All Its Charm by Christophe Bénard
Despite the ongoing effort from camera manufacturers to increase the dynamic range of digital camera sensors, capturing the full range of tonal values in a scene remains a critical challenge for most photographers.
But what is dynamic range exactly?
In photography, dynamic range refers to a camera sensor’s ability to record details both in highlight and shadow areas. In other words, dynamic range marks the difference between the darkest and lightest tones in an image. The best sensor on the planet, which is the human eye has an astonishing 21-stop dynamic range while the best cameras available today can only achieve approximately 15 stops.
In order to broaden the range of contrast in a single image while maintaining details in both highlights and shadows, digital photographers, for years, have relied on a post-processing technique called high dynamic range merging, also known as HDR. HDR consists of digitally combining several images taken at different exposure levels by varying the shutter speed.
Unfortunately, over the years HDR photography has become a pejorative term due to the unnatural results we have all witnessed in say, real estate and landscape photography, as photographers relied on presets and automatic image blending to yield affected images.
Personal Vantage
As an architectural and interior design photographer, I heavily rely on manual HDR post-processing techniques. Since early 2016, Capture One has been my photo editing software of choice due to its unmatched tethering stability and the control offered by its powerful features. So far, my workflow mainly consists of image capture and adjustments in Capture One followed by advanced retouching and image blending in Photoshop using luminosity masking techniques.
For a while, the current high dynamic range tool in Capture One—despite its ability to recover highlight and shadow—lacked the ability to blend several exposures together. Therefore, I was particularly excited about Capture One 22’s new features. I was recently asked to evaluate the new HDR Merge tool and see how it could fit into my architectural image editing workflow. So without further ado, let’s jump into it.
HDR and Interiors
The interior image below was shot during a recent shoot for PCL Construction of a new branch of the Canadian Western Bank in Edmonton. In this case, a bracket of three images with 1.0 EV between each image was shot using a tripod. I made sure that the brightest exposure had details in the shadows and the darkest one showed enough details in the highlights.
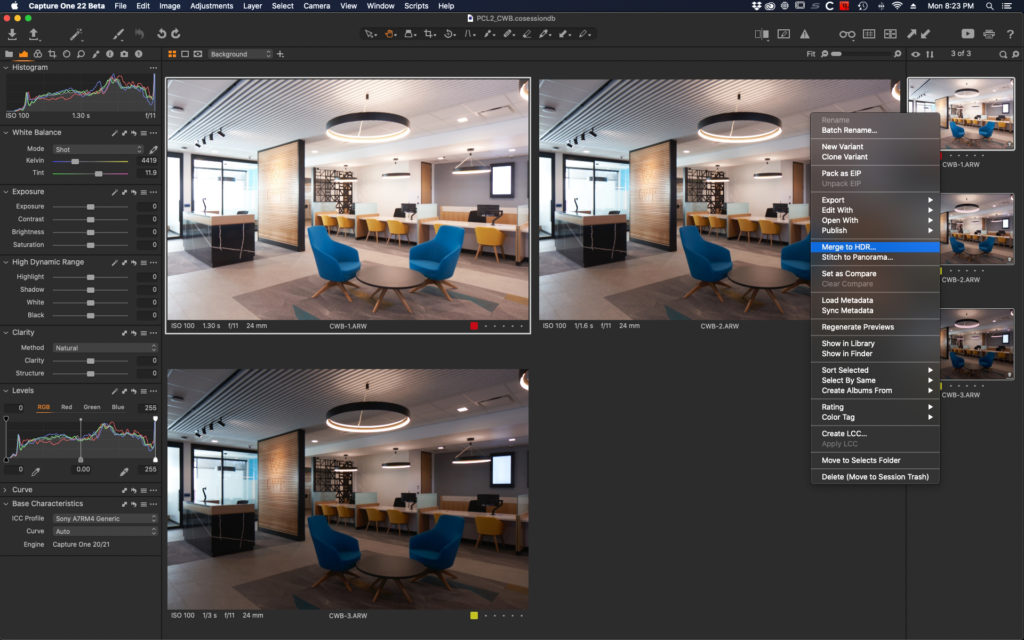
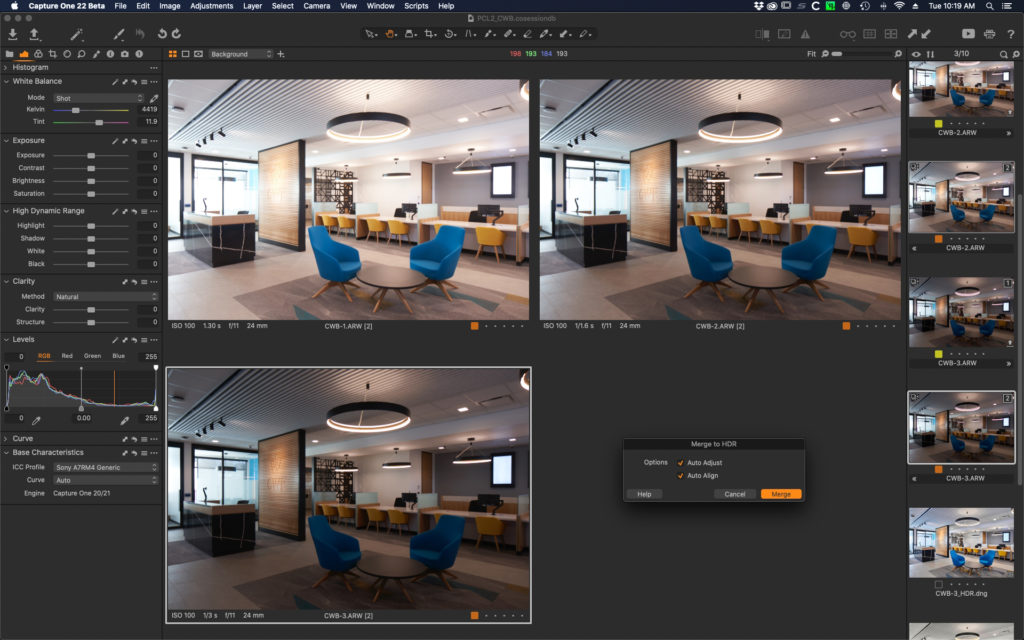
At this stage, I would normally make some adjustments to my base exposure in Capture One, then apply the same adjustments to each image in the bracket, and finally stack them as layers in Photoshop. I would then create luminosity masks in order to keep my highlights and shadows under control. Finally, the color of different areas of the image that require corrections would be selectively adjusted. The new HDR Merge tool in Capture One made things significantly easier. For starters, I only had to select the RAW images I wanted to merge without adjustments, right click, and select “Merge to HDR” within Capture One. To the reader: when applying adjustments to the images prior to merging, it’s not required because the algorithm uses the original unadjusted RAW files only.
A dialog box then appeared with two options:
- Auto-adjust, which as the name implies automatically applies adjustments to the exposure, contrast, brightness, high dynamic range and levels. I chose to leave it off because I really wanted to compare the actual RAW file with the new merged image in its purest form.
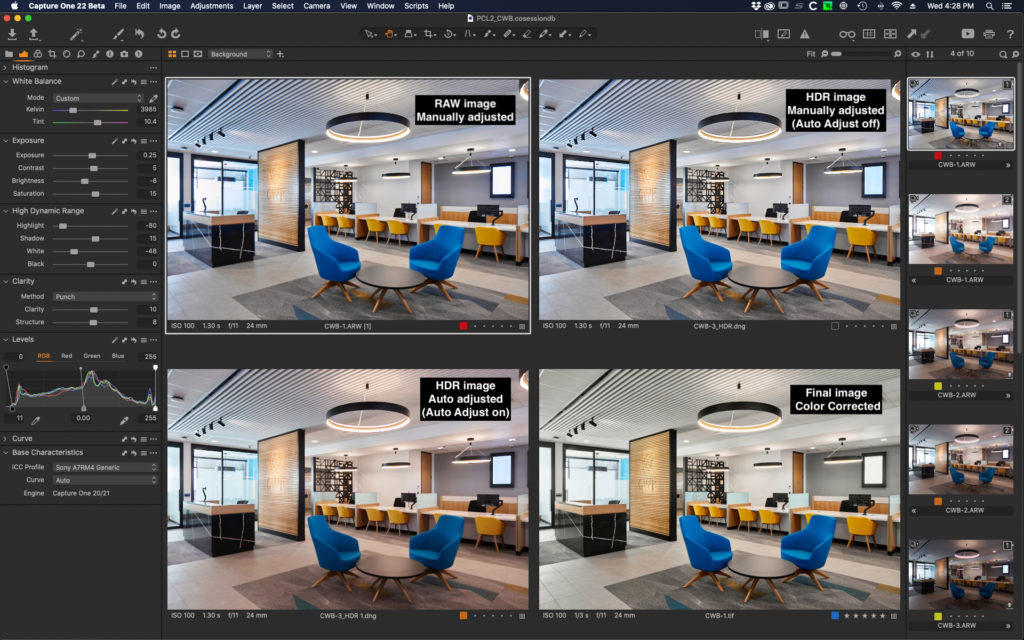
- Auto-align, which is self-explanatory and useful in cases where the images are not shot on a tripod. Even though everything was captured on a solid tripod in that case, I decided to leave that one on.
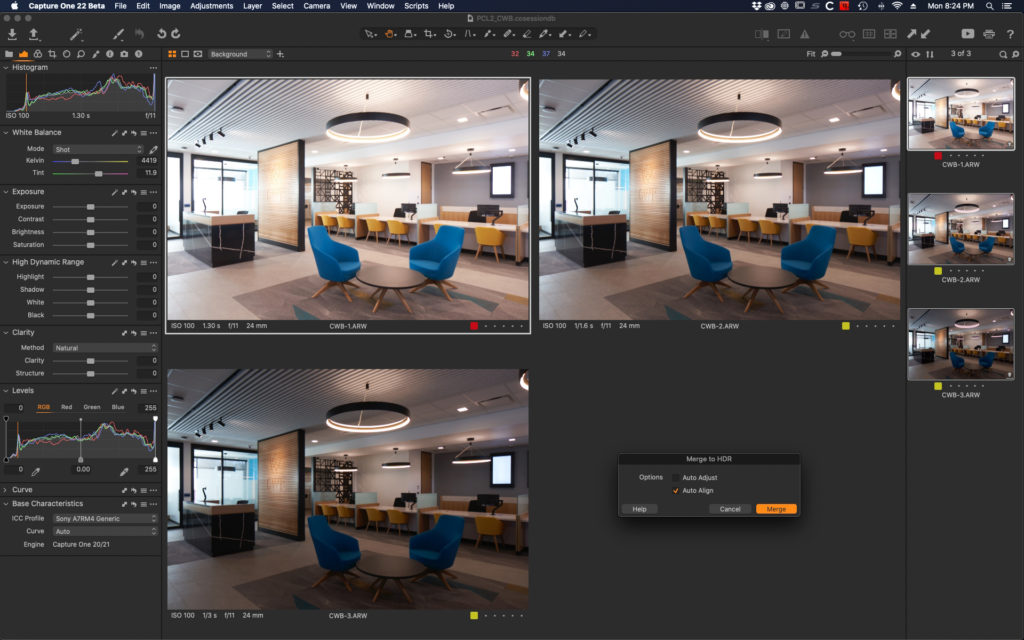
Auto adjust off
After pressing “Merge” a new window popped up to let me know that the merging process was starting.
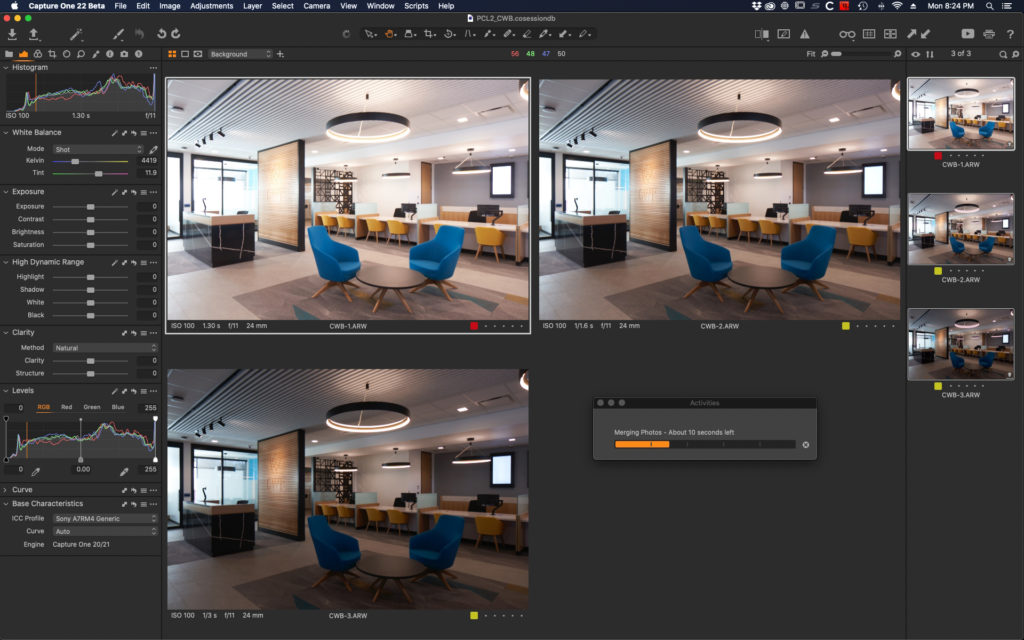
The images were shot at full resolution on my Sony A7R IV and it only took 30 seconds to generate the HDR .dng that appeared next to the input images. I then made some adjustments to the new HDR .dng file like I would on any RAW file and compared it to the original image with the same adjustments applied:
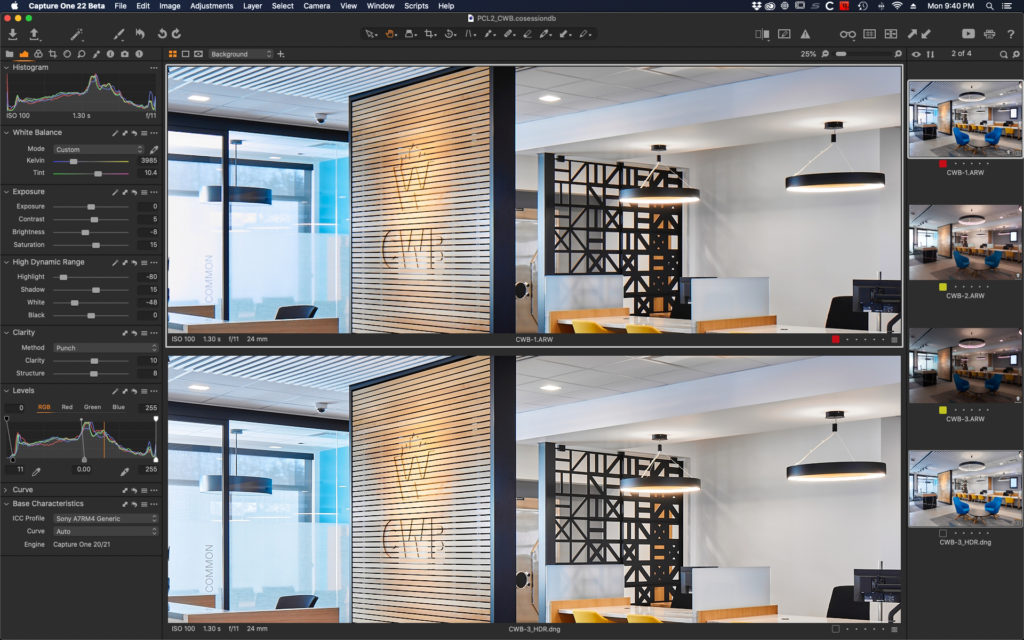
As you can tell in the close-up above the difference is significant in the highlights: the windows on the left don’t have blown out areas anymore and the light fixture highlights in the merged image at the bottom look cleaner as well. Most importantly everything was accomplished without leaving Capture One.
Auto adjust on
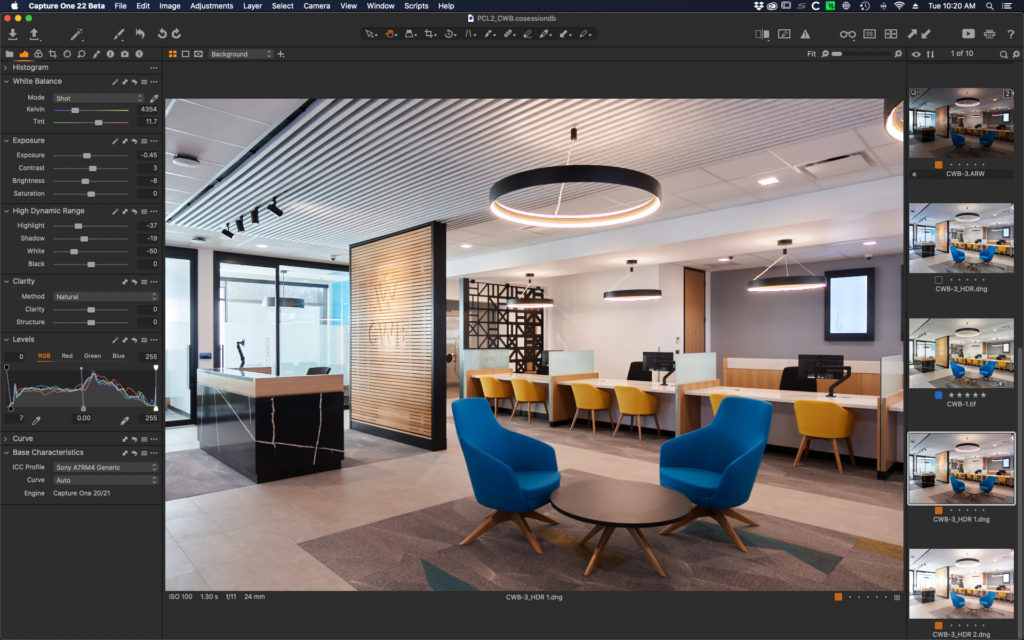
The same merging process was repeated with “Auto Adjust” selected
I am generally not a fan of auto adjustments, but the tool did a fantastic job recovering highlight details and creating a well-balanced image. I personally like my images more contrasty and felt the algorithm under-exposed the image a bit to keep the highlights under control. Still, moving a few sliders wouldn’t take much effort to enhance the result. Pretty impressive considering it all occurred in one step!
Advanced color adjustments and a few touch ups were then performed in Photoshop to produce the final image that was delivered to the client.
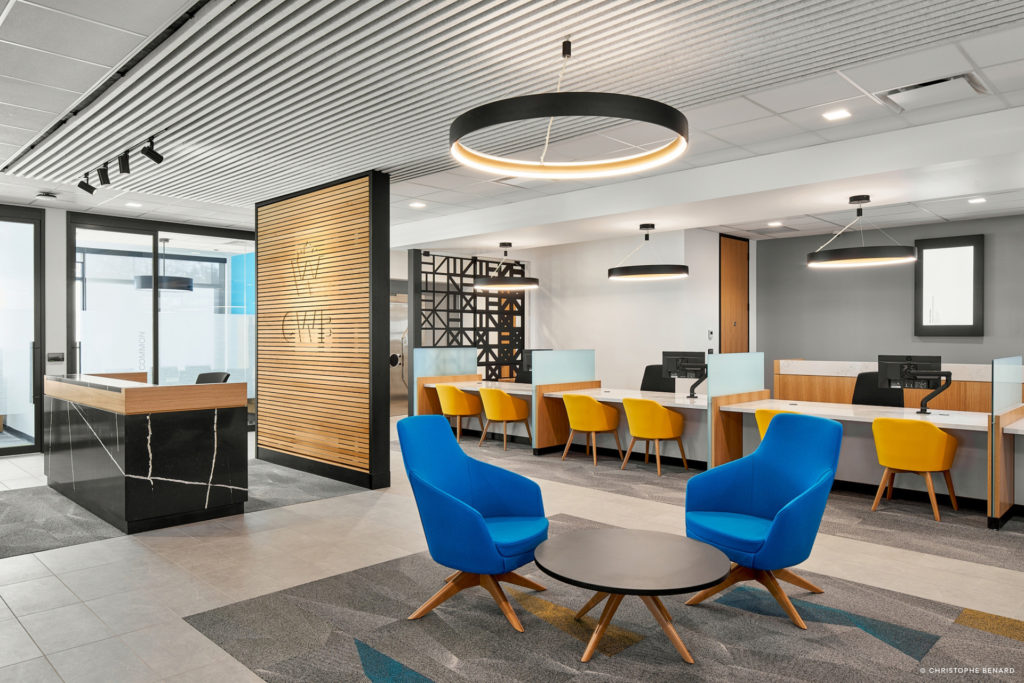
Overall, I was quite impressed with the increased dynamic range obtained when merging bracketed images directly within Capture One and will definitely add the new HDR Merge tool to my toolbox when editing future images.
Christophe Bénard
Christophe Bénard is an architectural and interior design photographer based in Alberta, Canada. Christophe’s imagery highlights space, perspective and the interaction of people with the designs. His work emphasizes colours, lines and textures through the use of refined composition and lighting. Christophe’s work has quickly gained international exposure thanks to his uncompromising eye for detail and willingness to share knowledge with others. His client list includes local businesses, as well as national and international firms.


