I hope by now you’ve had the chance to explore using Local Adjustments on your images. It has certainly brought the ‘darkroom’ back to my photography.
Capture One Pro 7 allows you to add up to ten different local adjustment layers with individual changes to Color, Exposure, Clarity, Moiré and Sharpening.
The so-called extra features that I am going to describe here are the ability to Copy, Invert and Fill a mask. These three actions can help you save time, and aid in the creativity of your images.
The not-so-red robin
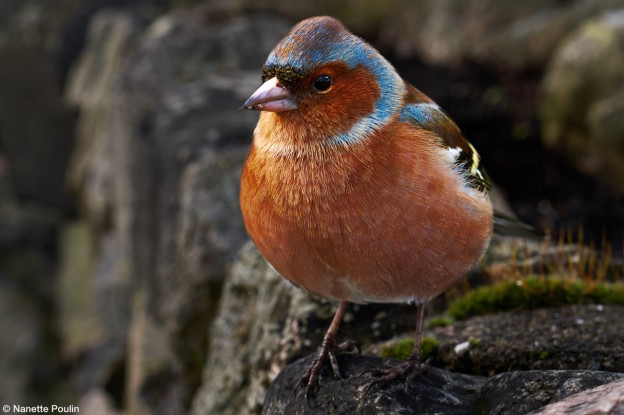
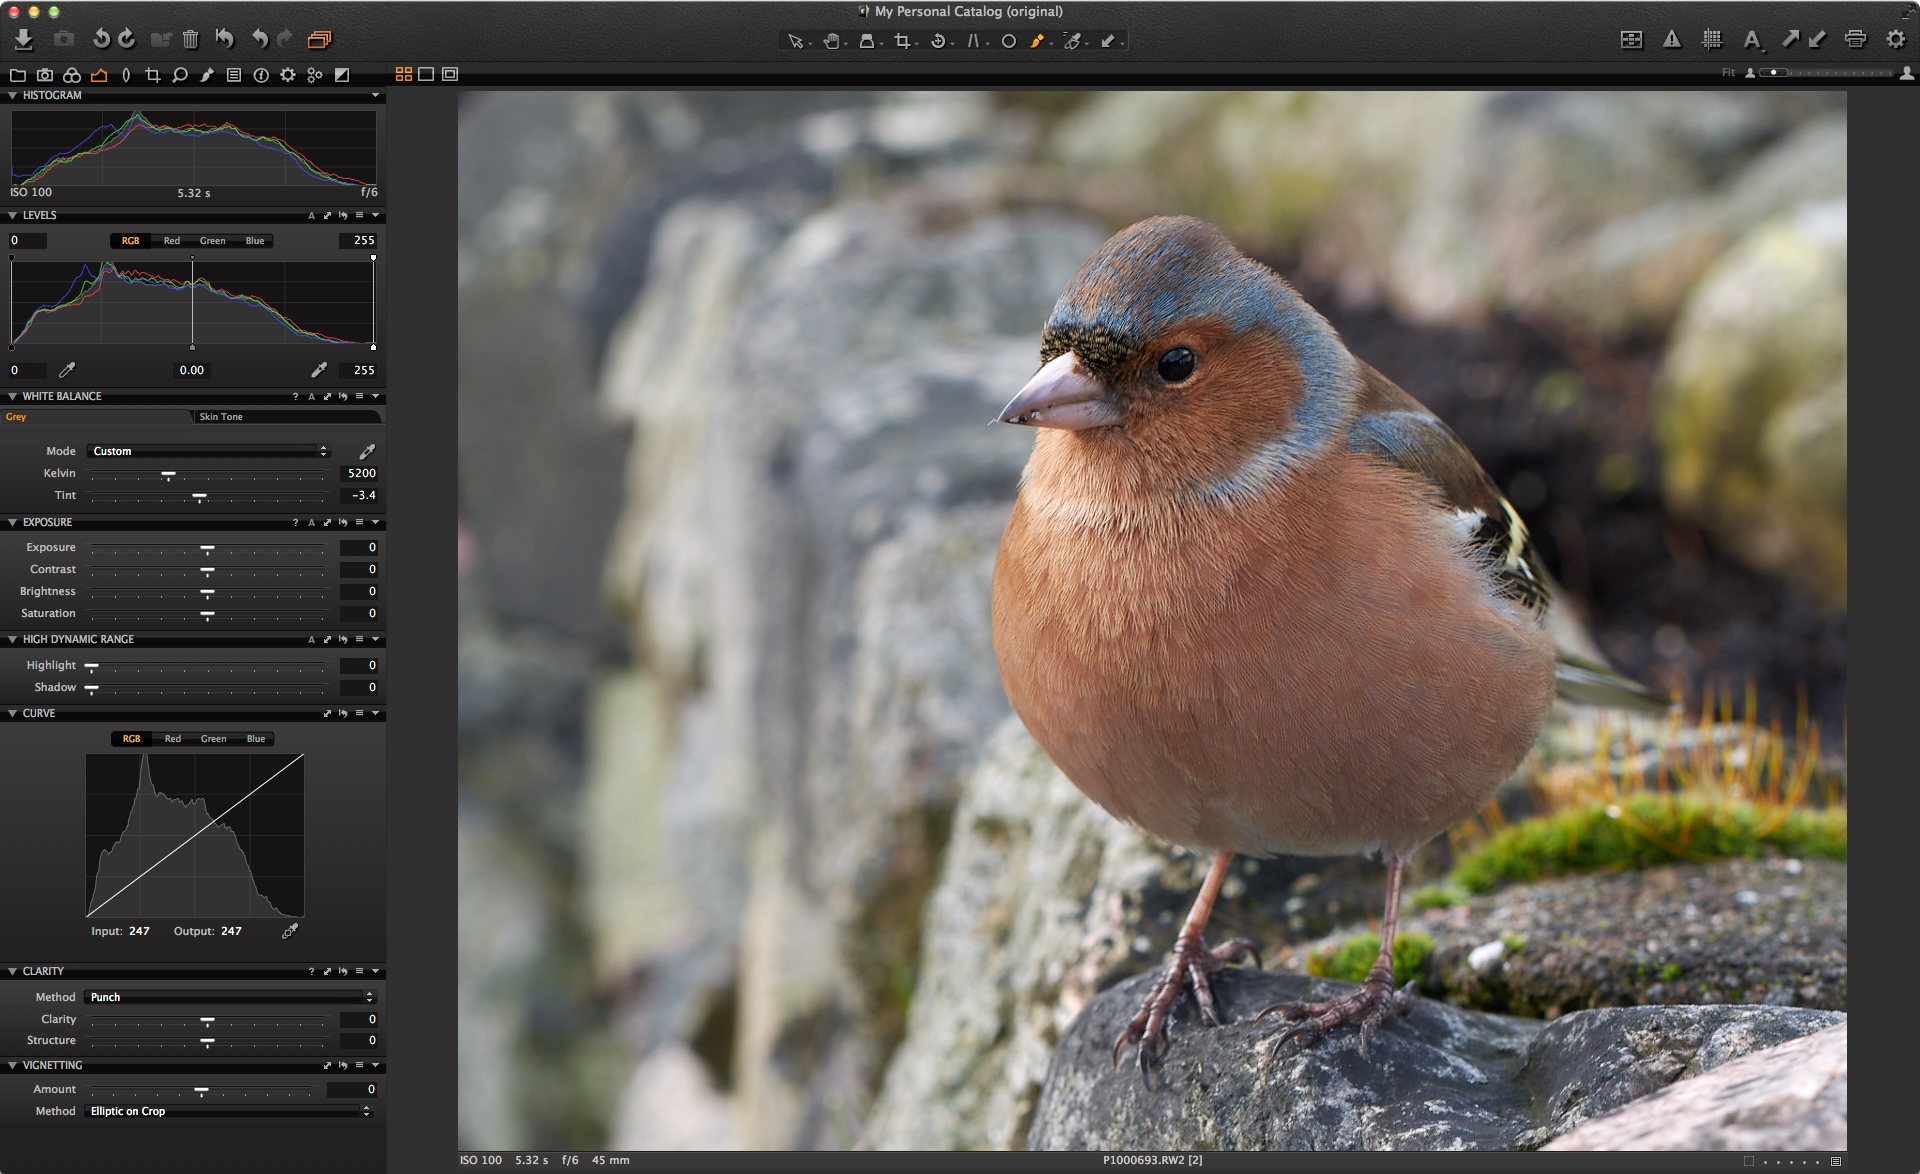
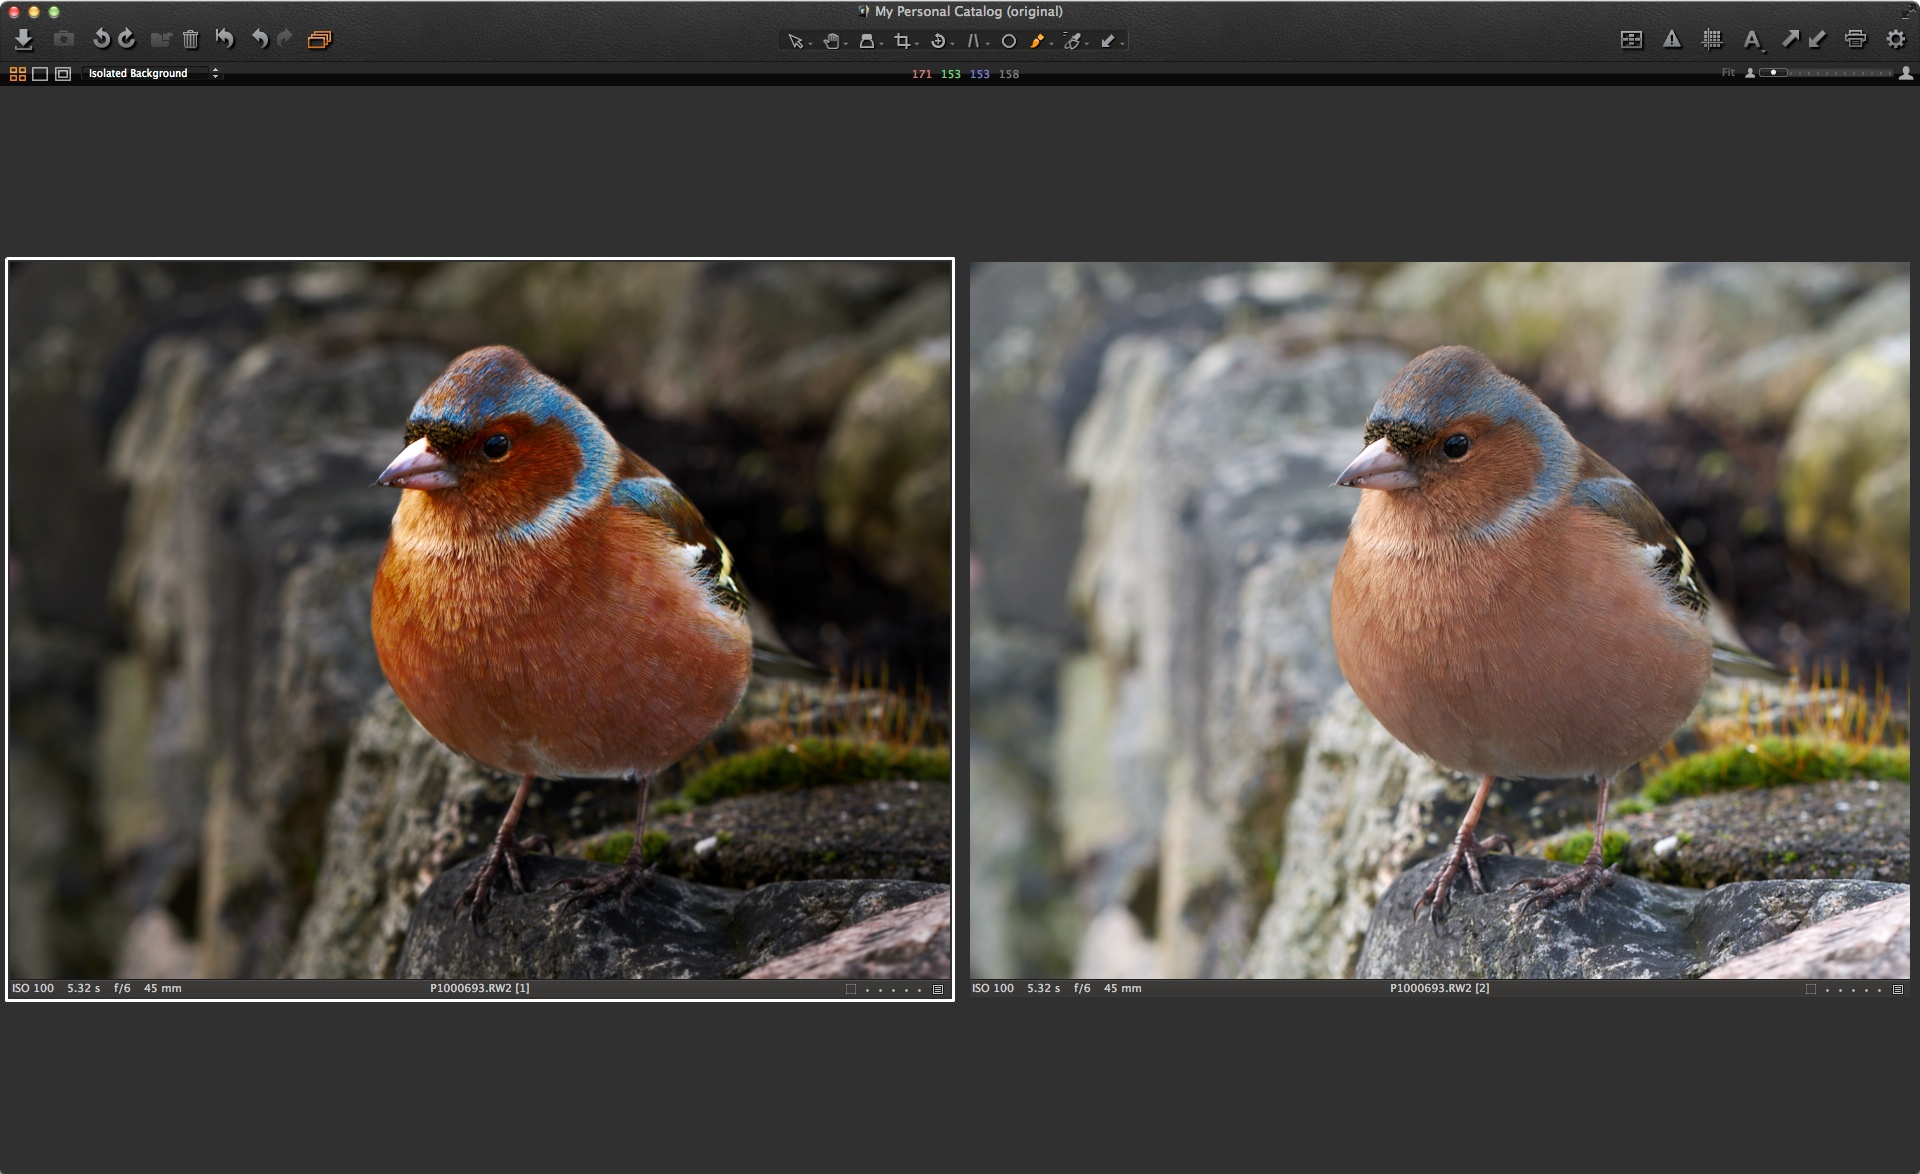
The title image here is a little colorless and flat with no adjustments made in Capture One Pro 7.
My plan for this image is to improve the saturation and clarity of the robin and make it stand out more from the background. I’ll also apply sharpening to only the robin itself, as there are no details to sharpen in this shallow depth of field image.
I’ll start by drawing a mask on the robin. I have selected a fairly hard brush so I can get a good accurate edge.
I am drawing the mask with a Wacom Pen and Tablet, which I find much easier. I wrote about this in more detail in a recent blog post if you want to know more.
It was pretty straightforward to draw this mask so far, but I’ll need to reduce the brush size and add in the beak. I can use the Wacom tablet’s Precision Mode to help with drawing this small area.
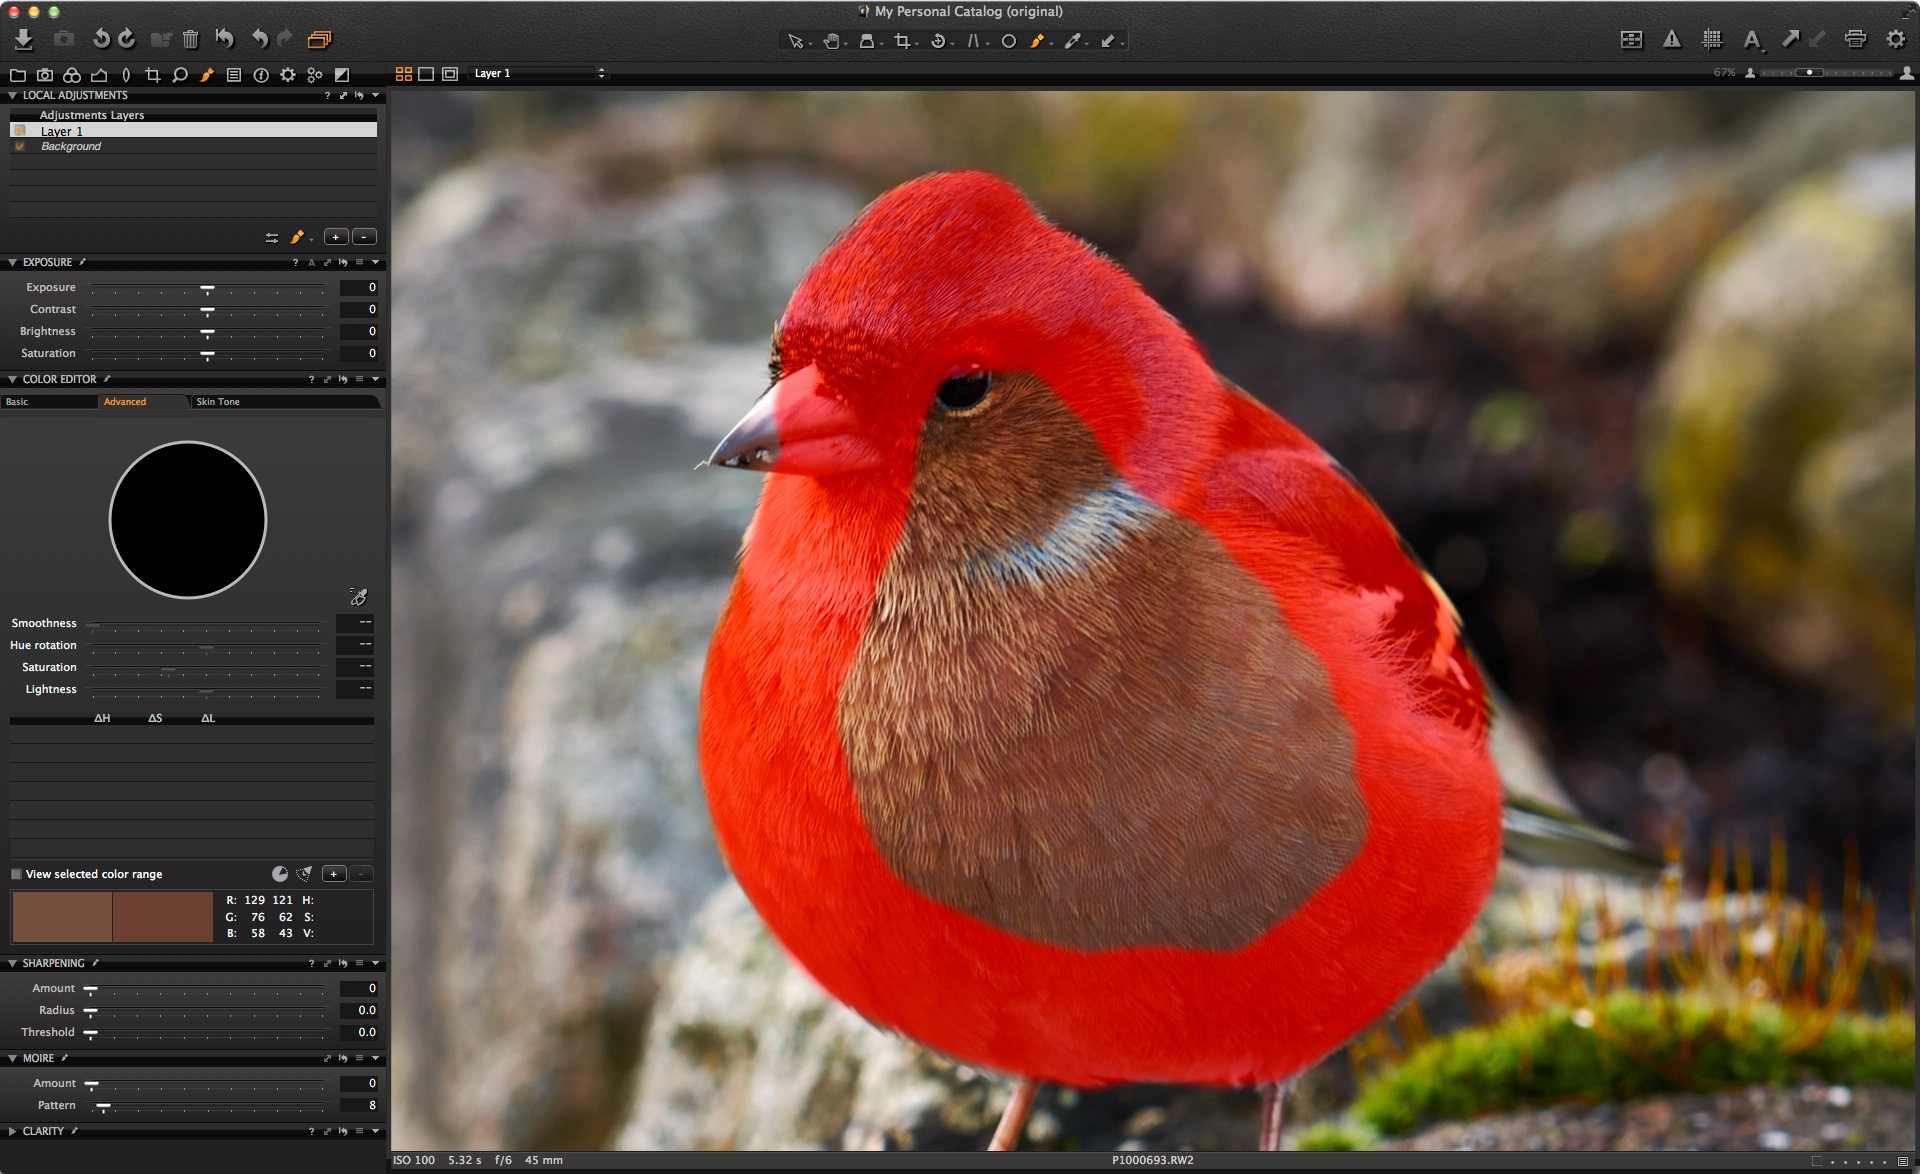
To save a bit of time, I don’t need to brush in the centre of the robin (see the first screen grab of the mask) as I can just use the ‘Fill Mask’ command. This will fill in the ‘hole’ in the centre of the mask.
Access this by clicking on the small arrow in the top right of the Local Adjustments Tool. The mask is now automatically filled in.
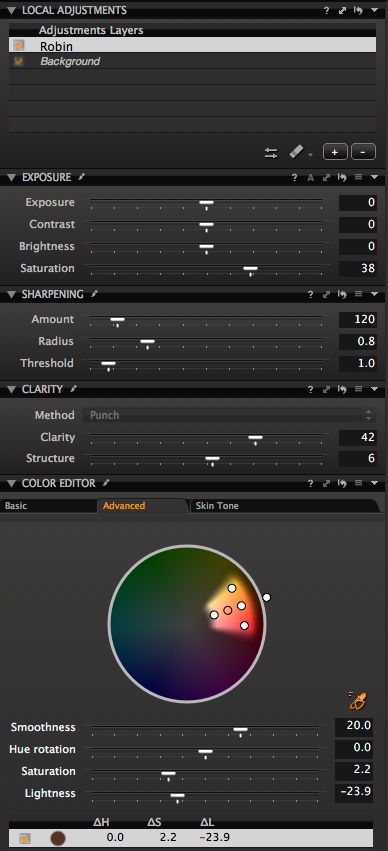
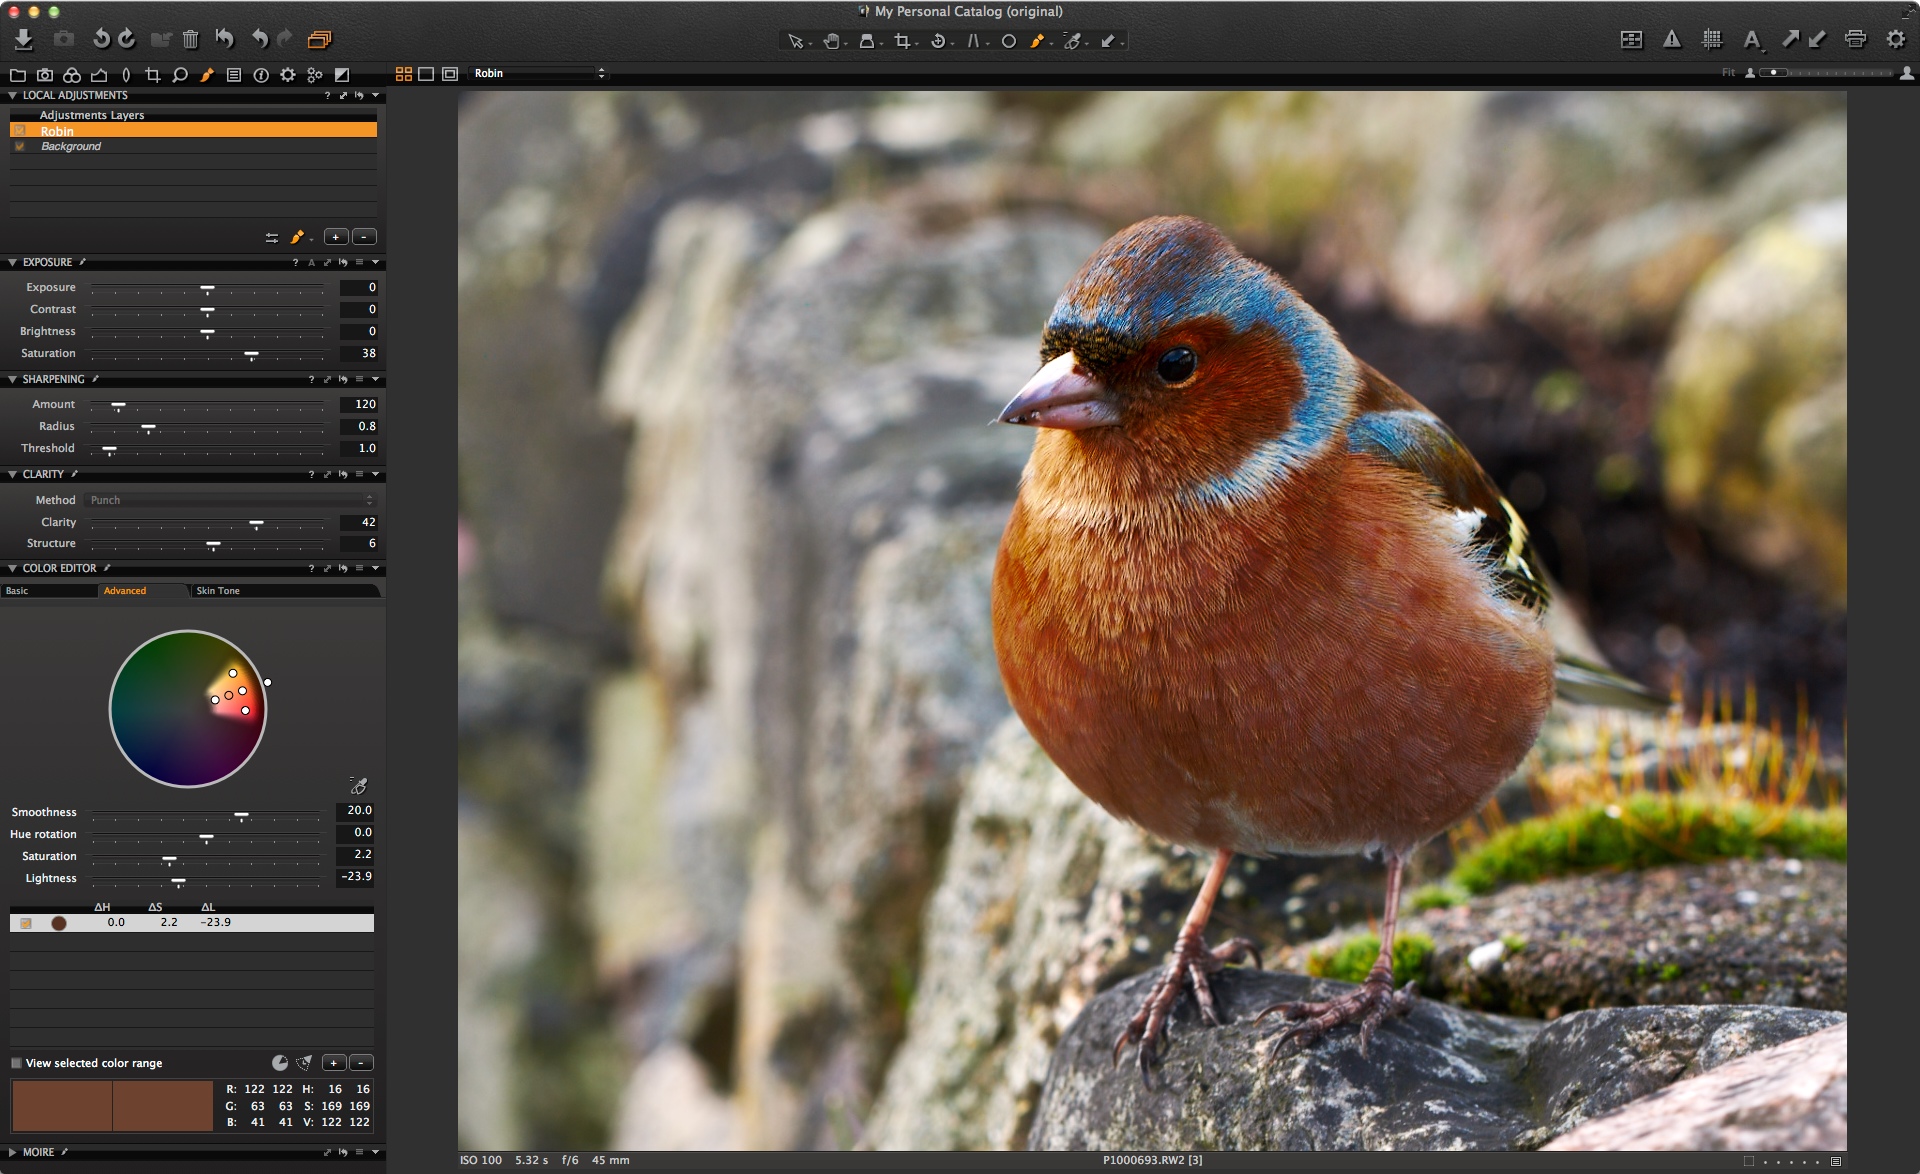
If I need to, I can clean up the edges a little, but I am pretty happy with the first result! You can also see I have named the layer ‘Robin’ so I can keep track of what layer does what. This is very useful if you have several layers to keep track of. To name a layer, just click on the default name.
Now I can set my adjustments for the robin itself.
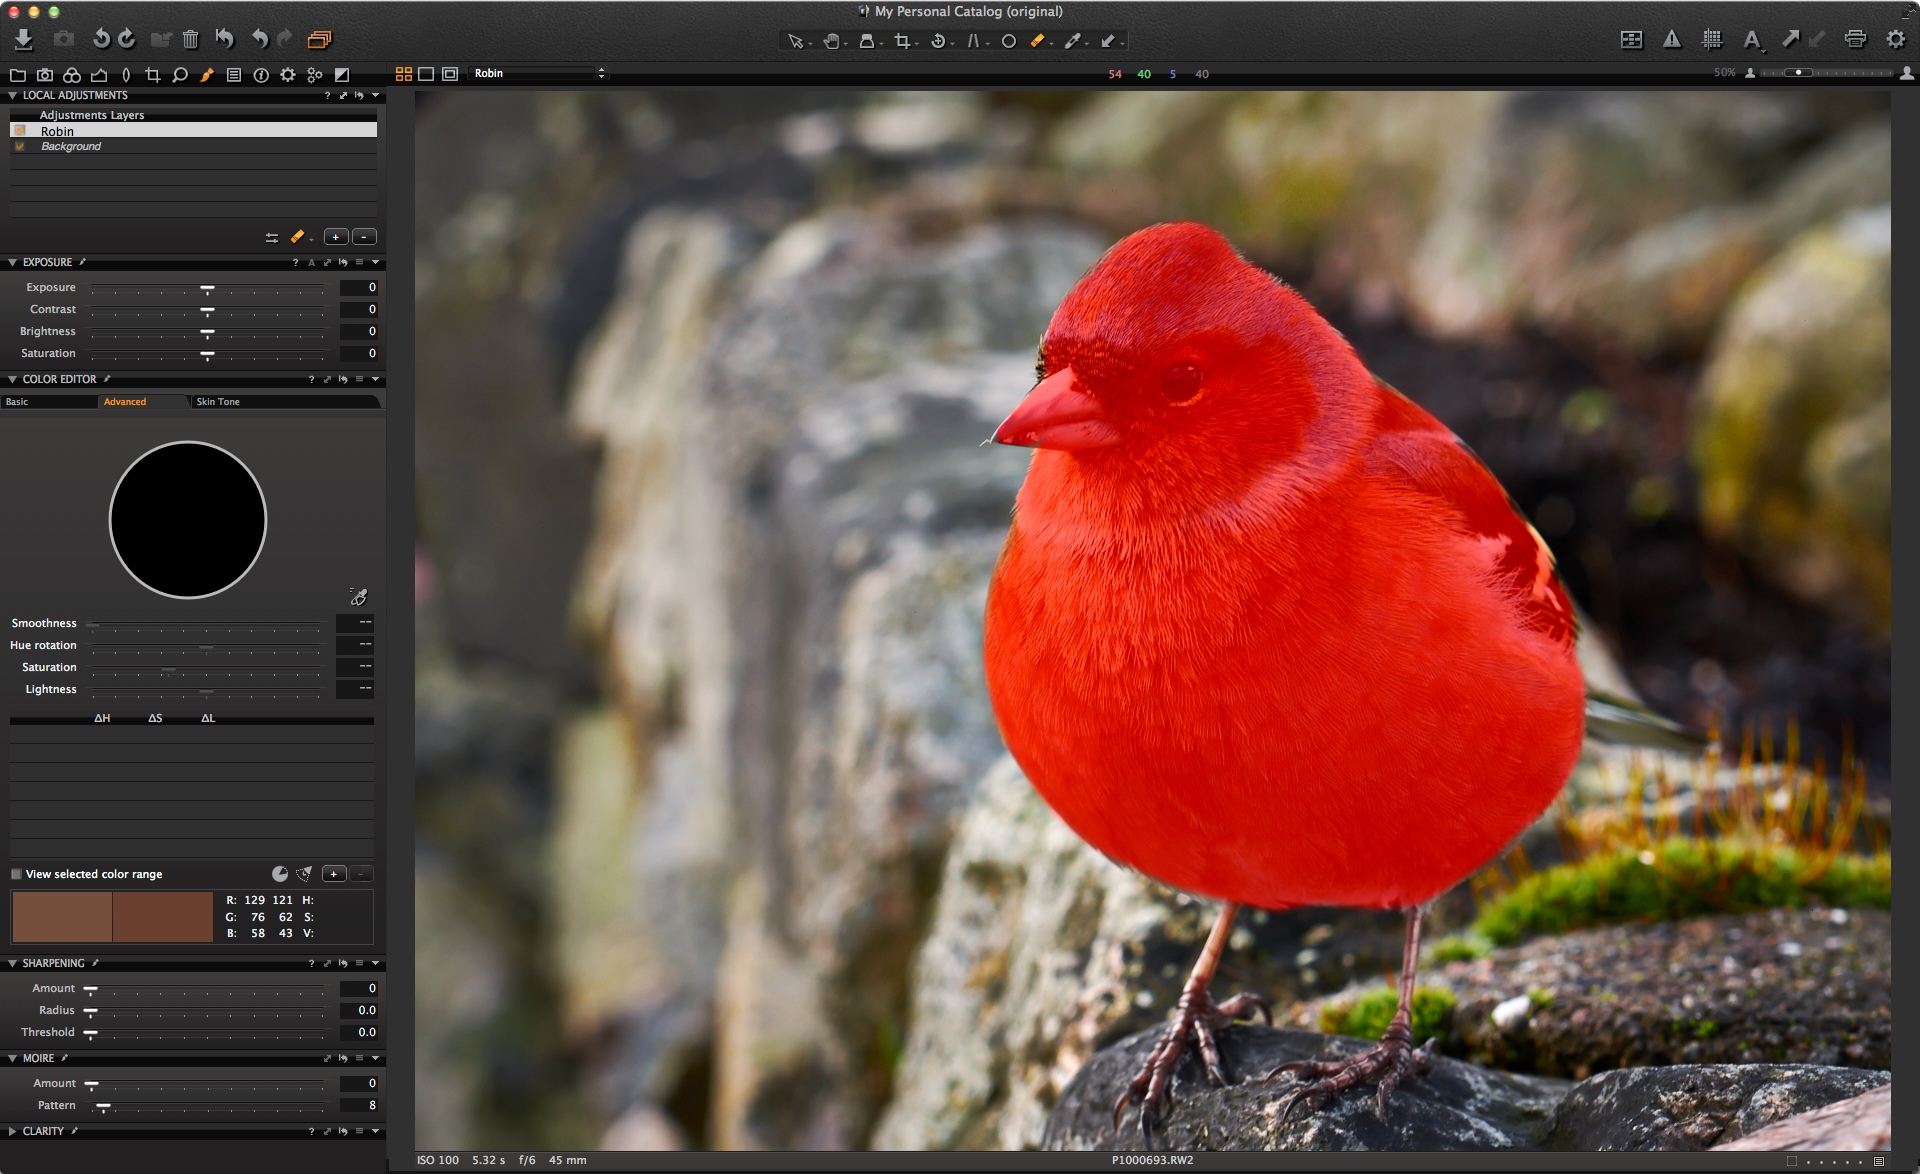
I have increased the Saturation, applied some sharpening (I had disabled all sharpening in the Background layer, simply by choosing the Preset ‘No Sharpening’ in the Sharpening Tool ), increased the Clarity and Structure and finally made a selective color correction of the chest feathers with an increase in Saturation and reduction of Lightness.
It looks much better now.
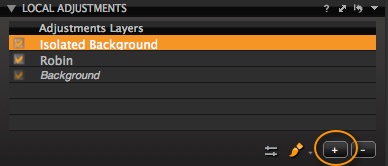
Now to work on the background. It would be a waste of time to mask out the background as I already have the inverse – the robin. First of all, I will make a new empty layer by clicking the plus icon, and call it Isolated Background.
Then copy the mask from the Robin layer to this new layer in the same menu.
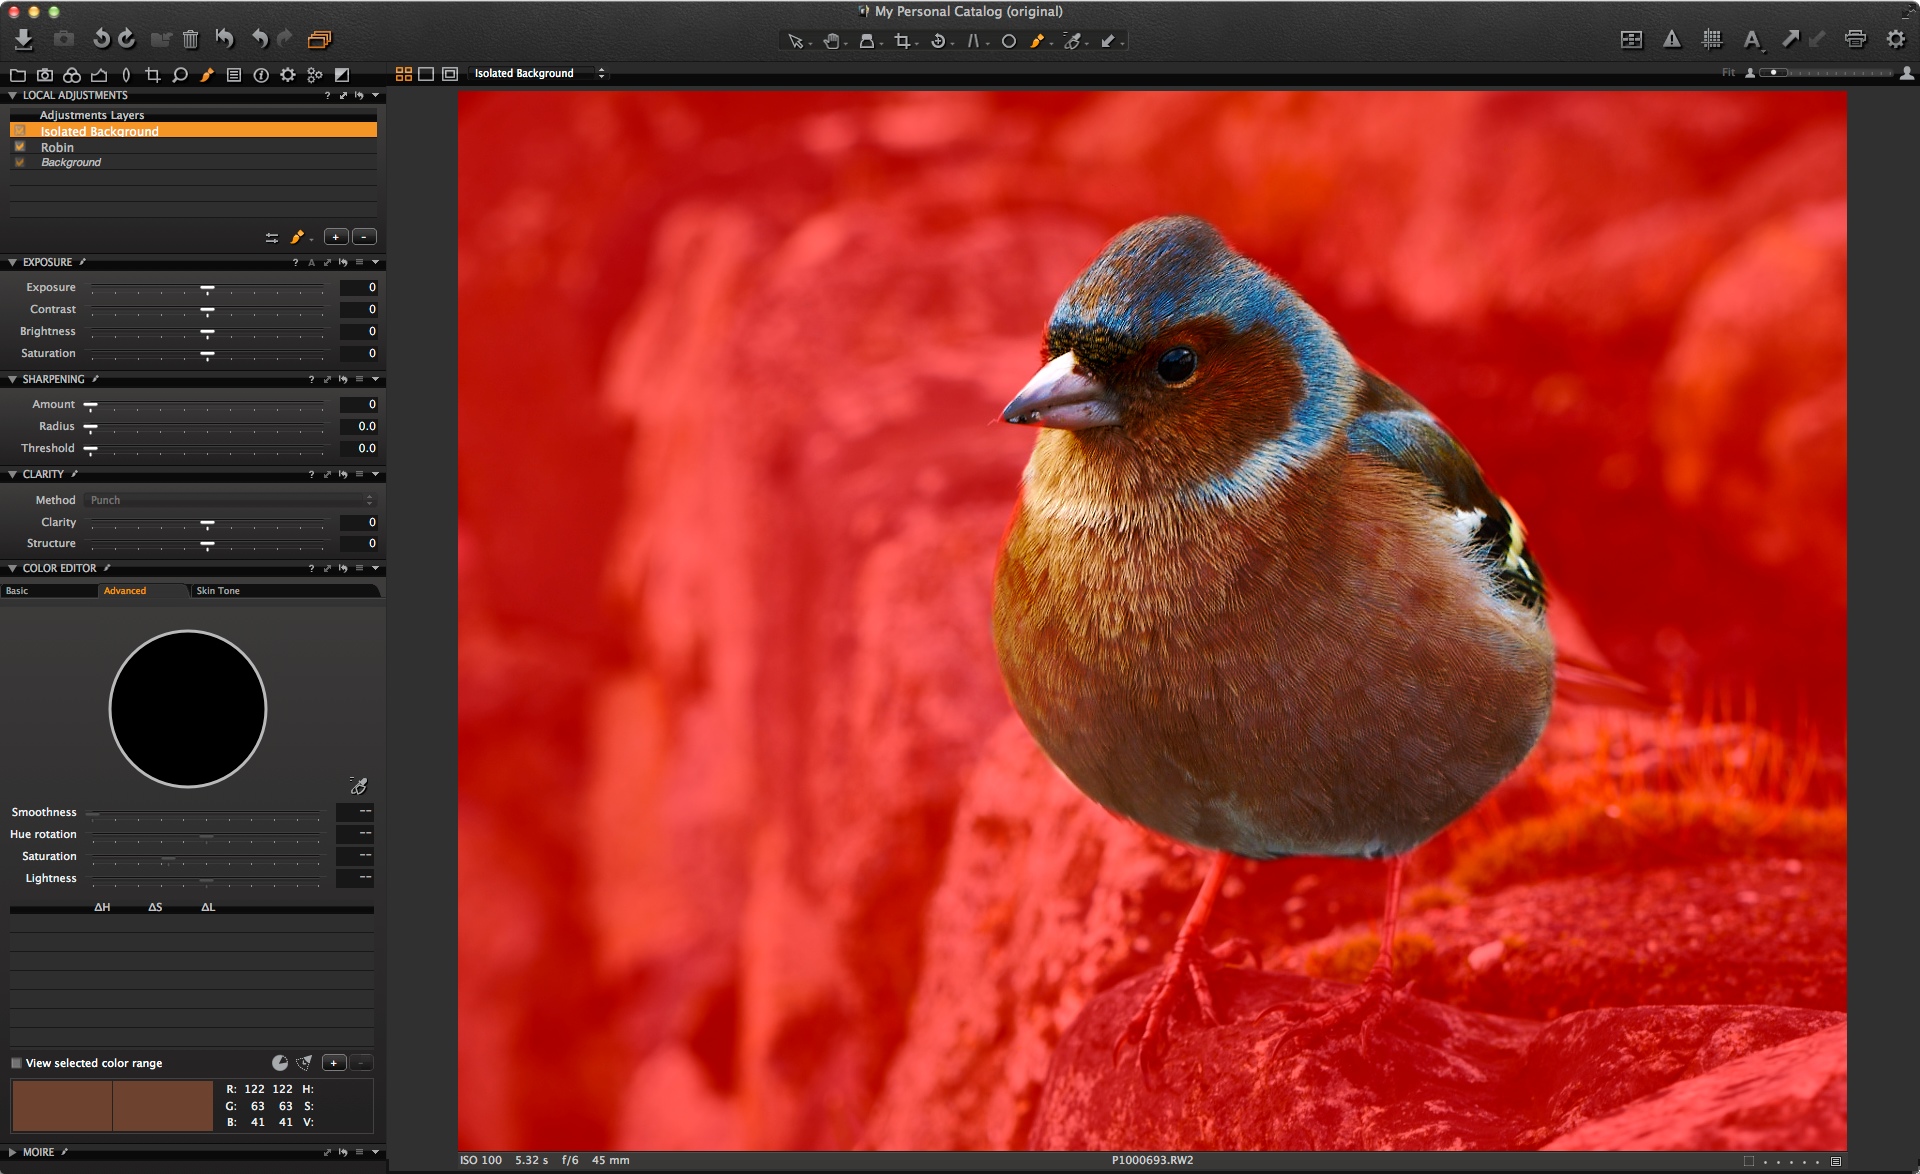
Now, the Robin layer and Isolated background layer match, so the final step is to invert it, so I just have my background masked.
Now, the mask looks like this.
Perfect! For the background I have decided to desaturate and darken it a little, soften it with some negative Clarity and make sure no sharpening is applied.
 Here is the final result alongside the original image. I hope you agree it is somewhat improved.
Conclusion
Fill, Invert and Copy mask functions are simple but can certainly shave a few minutes off here and there when creating multiple layers. Don’t forget that even after copying or inverting masks, they can still be edited with the Draw and Erase mask brushes.
Best regards,
David






Your robin is in fact a chaffinch, which might explain why you don’t find it red enough.
Hi Renaud,
Well, guess that shows how much I know about ornithology. Looking at it now… I don’t know what I was thinking. Not one of my most observant days I guess!
Thanks for pointing out the error of my ways.
😉
David
Can individual colour temperature (White Balance) values be applied to different layers as in Photoshop?
Hi Chris,
Not currently. But you might be able to achieve the same with the colour editor.
David
Another great demonstration of your expertise.
Bravo and thank you.
Thanks Pascal!
Even though the ‘robin’ has resulted in the wierdest chaffinch I have ever seen I will still find your tutorial extremely useful in improving my images. Ornithology may not be your forte, local adjustments are not mine. Thank you David.
I swear I’m better with dogs. 🙂
I thought it wasn’t the common European Robin but some other one.
Still you improved its looks so it should be a happier bird. Good article.
I’ll use that excuse. 😉
Thanks!
Too much saturation, no more shadow detail.
Most helpful and most informative. I have been using the gradient mask to correct an over exposed sky, for that purpose local adjustments is ace. The software never ceases to amaze me.
Thank you
I prefer the original, the chaffinch colour was just right. But I learned some about what local adjustment can do. Interesting that you can unsharpen with clarity, I’ll try that some time.
It probably was!
I’ll look for a Robin I can turn into a Chaffinch.
Very well put together and explained real nice. Thanks a ton for your help to us all.
And Renaud does not know that bird as well as you do, during the private session with her. Of course you knew it was a Chaffinch, but her birth name was Robin, it showed in her pilot license, right?
Absolutely. ;). It’s a fitting name for her.
Well, I have never met that particular bird, so I’m only speculating here, but I’m pretty sure we’re talking about a male finch here. I’m sorry to tell you that the flight license “she” showed you is probably a fake. And I wouldn’t be too optimistic about the phone number she gave either… God I hate to be the bringer of bad news!
Anyway, great tutorial, I probably should have written that in the first place.
Foiled again! 😉
Thanks, I am glad the concept is useful.
Hi David
in your explanation above about masking out the robin and applying local adjustments. You used the colour editor to adjust certain colours on the bird. Do these adjustments only occur within the masked field ? I try and use colour editor within a mask and the entire scene changes.
Yes, they should occur only in the masked layer.
Are you sure you were not working on the Background layer?
I’m having this exact problem. The thing is too, when I create a new adjustment layer, the color editor makes itself unavailable to use, it won’t let me select a color.
Hi Kent
Sounds like making a support case would be a good idea.
https://www.phaseone.com/en/SupportMain.aspx
David
I am wondering what happened to the original image? I hope you weren’t shooting with a Phase One back. It is so desaturated and soft I am wondering if you know why this is. To me it looks like the image is overexposed by over a stop. Could this be it?
Hi Alectron,
This was shot with a Pansonic GF-1 so not really upto the standard if a Phase One back! But still a great little camera.
It is a little over and I find with the Panasonic it then gets slightly under saturated.
David
Thanks, David!
Easy to understand.
Thank you!
Thanks for the Tutorials they are all a big help. A question, after working in the different layers (local adjustments) how do you save them to the final image.
Hi,
Simply goto file>export variants or use a process recipe.
David
The robin/chaffinch confusion is already cleared up so there goes my first point I was about to comment on.
But: Why did you leave its tail out? It doesn’t show clearly in the original picture but it is there. Leaving it out of the whole make-over has it almost disappear and makes the shape of the bird look too artificial, like a paper cut.
Just saying.
Hi Susanne,
Not intentional – just an oversight on my part. 🙂
David
Hi,Its a grate tempting demonstration. Thanks. RK Bashi frm INDIA
Thanks RK!
I presume that the intention here was to make the Chaffinch look like it was getting ready to put in a shift as a radioactive circus clown?
Absolutely Keith. Mission accomplished!
Hi David
I have a question about the sharpening
Is it possible to use it on local adjustment using all the three adjustment of it, i mean “Amount, Radius and Threshold”
Thanks
Simply put – yes!
Thanks for your quick answer, the resaon why i asked you, is i am on the way to get C1 and i am using a trial version, and when i tried to do it so, i had just access to to sharpening”Amount” and radius and threshold was in “grey”
So maybe i did something wrong and i will try again tonight
Thank You for Your post .
I’m newbie in Capture One and studying treatment photos. And both , tool tips as the tips of image analysis are useful for me.
Thanks again Fabio!
How can I save my local adjustments for other photos?
Hi Jacek,
You can copy local adjustments in the same way as any other tool.
Select the image with the local adjustments you want to copy and the others that you want to apply to.
Click the small up/down arrow in the Local Adjustments tool bar, and the the button ‘apply’.
David
There seem to be several limitation with “saving” local adjustments – can you tell me if I’m incorrect on the following:
1) No ability to create a preset for local adjustments? (EG once cleared from the clipboard they’re gone and you must re-search for a photo that has the settings you want to copy?)
2) Local adjustments are copied/pasted “All or Nothing” – meaning a) all layers are copied (not just a specific layer you may want) and b) pasting will REPLACE (wipe out!) any existing layers in the destination pic?
3) Layer masks are always copied, even though in many cases masks are pic dependent.
If these are correct, do you have plans to expand the functionality?
Thanks,
Alex
Hi Alex,
The reasoning is that Local adjustments are 99% of the time unique to an image. I.e. it will be very rare that the mask will be the same image to image, unless in a sequence of course. Then you can copy / paste from the Local Adjustments tool.
Therefore there is no preset, due to the likely uniqueness of a mask and adjustments to the image.
We haven’t had plans to expand the functionality as the use case for it is very slim. Unless more of you chime in and say otherwise!
David
Hi David, thanks much for your response.
I agree with you that masks are 99% unique to a photo, (which I said as well).
But I cannot agree the settings applied to the layer (whether they be a color tweak, clarity, sharpness or whatever) are unique – they are as “preset” as any other go-to settings we use repetatively.
An example off the top of my head – I often tweak/enhance the green of nature for a lush effect on the grass/leaves/plants when they look too yellow (read: dry) – currently I apply the color settings to the whole photo. However, this can cause skin tones to also go a little green (and also blonde hair).
The obvious “best” way to do this would be a saved layer style with the green color settings, where my workflow would be to add the layer, then just draw in the mask (over the green nature). Next pic.
But that’s one example of a thousand – how about a preset layer for softening skin? Eg whatever your favorite skin-softening settings are, you’d add it to the photo and just draw the mask over the skin you want softened.
Another are some settings I use on harshly sunny days, applied high contrast areas of people’s faces (not the whole photo). The settings are always basically the same, even though the mask is always unique. Presently, I add a new layer, draw in the mask AND set each setting because I can’t save/recall it. Recreating the settings each time is a real time waster.
So it’s not about saving the mask, it’s about saving the settings of the layer, with the ability to ADD them to a new photo (albeit maskless), without destroying other layers that may be there.
I can’t imagine anyone who uses layers & masks wouldn’t want to be able to save their favorite layer settings.
If you don’t think so, perhaps you could poll the users with the question at least?
Thanks again,
Alex
Hi David
I have to agree with Alex about the ability to save local adjustment brush settings as presets. Having a range of favoured presets for various adjustments (especially for portraits) is a great time saver when you have an image that only needs a few quick tweaks – it would be great if you could save a range of local adjustment brushes for things like Iris enhancing, catchlight enhancing, skin smoothing, teeth whitening etc. I’m sure that other users would appreciate the value of a feature like this in future upgrades.
Thanks
Gareth
Thanks for this nice article.
I also agree with Alex and Gareth about a possibiliy of preserving custom settings to quickly applying it to other images (settings, not the mask itself).
It is not yet as efficient as it could be.
I like the local adjustments feature, you can do basic things to your image, but it is not yet as efficient as it could be.
As it is relatively new, I fully understand that this feature is not yet mature. It is yet too time consuming to create masks in a complex picture, e.g. the sky shining through small “holes” in a tree silhouette, or masking (burning) candles, as the edges are not easy to catch. The automask feature is kind of a good starting point, although in practice it mostly fails in non-studio environments, as you cannot tweak its sensitivity or behaviour at the edges.
If you develop the masking feature further, which I really hope, you can make obsolete Photoshop post-processing for most of even rather complex images.
Just one suggestion would be: You have a really nice advanced color editor, where you can choose a color range and the respective pixels; it would be wonderful if you could simply add or remove all such selected pixels to/from an existing mask.
I am in the testing phase of C1 yet, I think it is one of the best imaging software out there, and if it would outstand more clearly from the competition, or at least catch up (also in other areas), I would even pay twice the price.
What is your requirements process, how do you gather requirements, suggestions, ideas from your existing or prospect customer base?
Thanks again and best regards
Marc
Hi Marc,
Thanks for taking the time to comment extensively. I agree there is so much scope for Local Adjustments! As with all new features in Capture One, is about finding the right balance.
We gather suggestions from a variety of sources (this one included!). If you want to formalise the process, then you can make a support case…
http://www.phaseone.com/en/SupportMain.aspx
Use the last link to contact support.
I personally like the idea of being able to convert a colour selection to a mask. I could see lots of uses for that.
Thanks again,
David
Fill Mask: “Access this by clicking on the small arrow in the top right of the Local Adjustments Tool. The mask is now automatically filled in.”
This is absurdly difficult to find. Come on make it more prominent.
Hi Doug,
The context with “Fill mask” menu also appears when right-clicking on the layer, or left-clicking on the “Adjust” button, which I find is a good place for this function. Maybe you’d agree, once you know it is there…
Imho, Capture One is so feature-rich that you can’t make every feature equally prominent, it would overload the user interface.
Best regards