While retouching with Photoshop isn’t a necessary step to get the best out of a picture, processing the RAW file is necessary. There are many RAW editing applications available on the market, and it can be difficult to find the one that best suits your needs.
I remember when I started photography, I was introduced to Apple’s Aperture, which has since been discontinued. So, I then moved onto Adobe Lightroom. Neither of them truly met my requirements. But eventually, I stumbled upon Capture One Pro and slowly made the transition. I’ve had extensive experience with all three apps. While none is perfect, there are at least ten reasons why I can’t leave Capture One and go back to any other RAW-processing software.
#1 Tethered Shooting Made Perfect
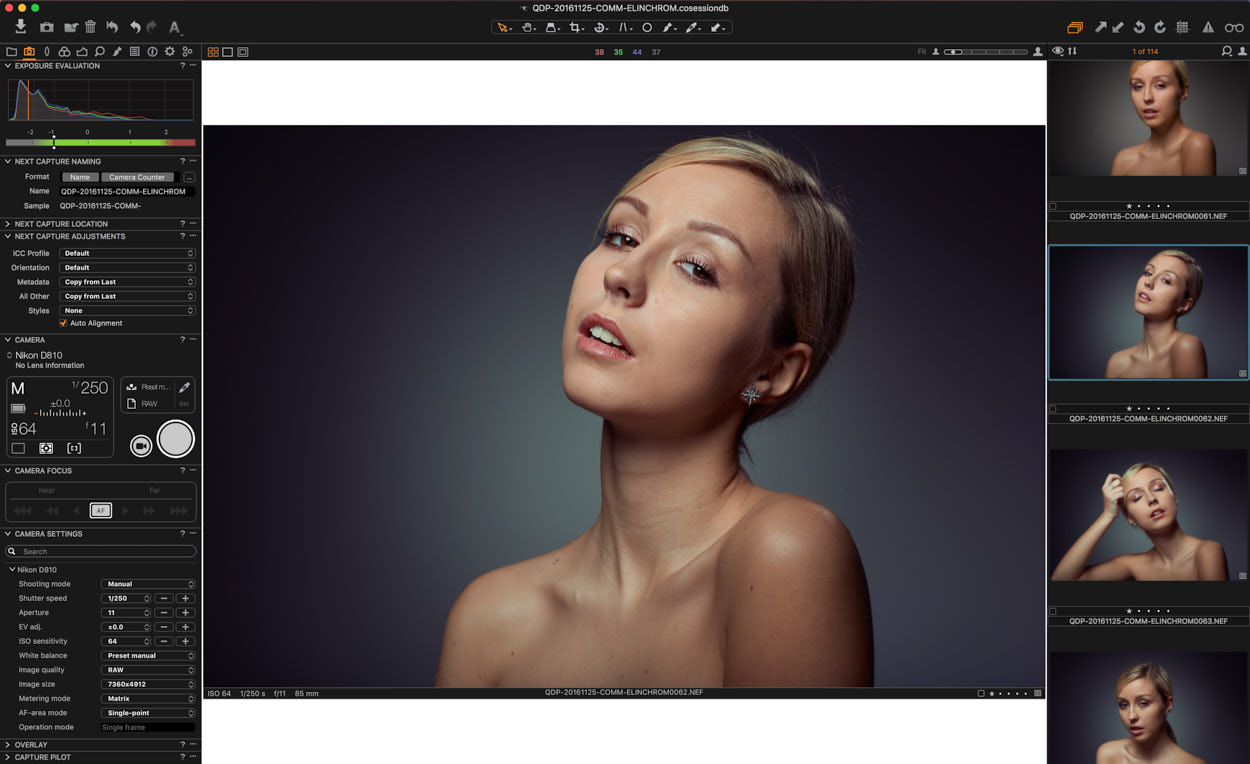
If Capture One has become the industry standard in commercial, fashion, beauty, or even still life photography, there must be at least one really good reason. To me, Tethered Capturing mode is that reason. Unlike most of its competitors, tethered capture in Capture One is reliable, and adjustments can be made on the fly, which offers clients a better vision of the end result. Plus, it’s easy to setup.
This is actually the reason I started using Capture One, and why I mention it first. Lightroom simply didn’t cut it when I shot tethered in studio. In the beginning, I used Capture One only for its tethering mode, and I would develop my files in Lightroom. But that quickly changed…
With Capture One 10, still life and macro photographers will be pleased to hear that they can finely set the focus within the app. No need to move to the camera to adjust it. No more trying to get it right with live view mode.
#2 Easy and Accurate Color Management
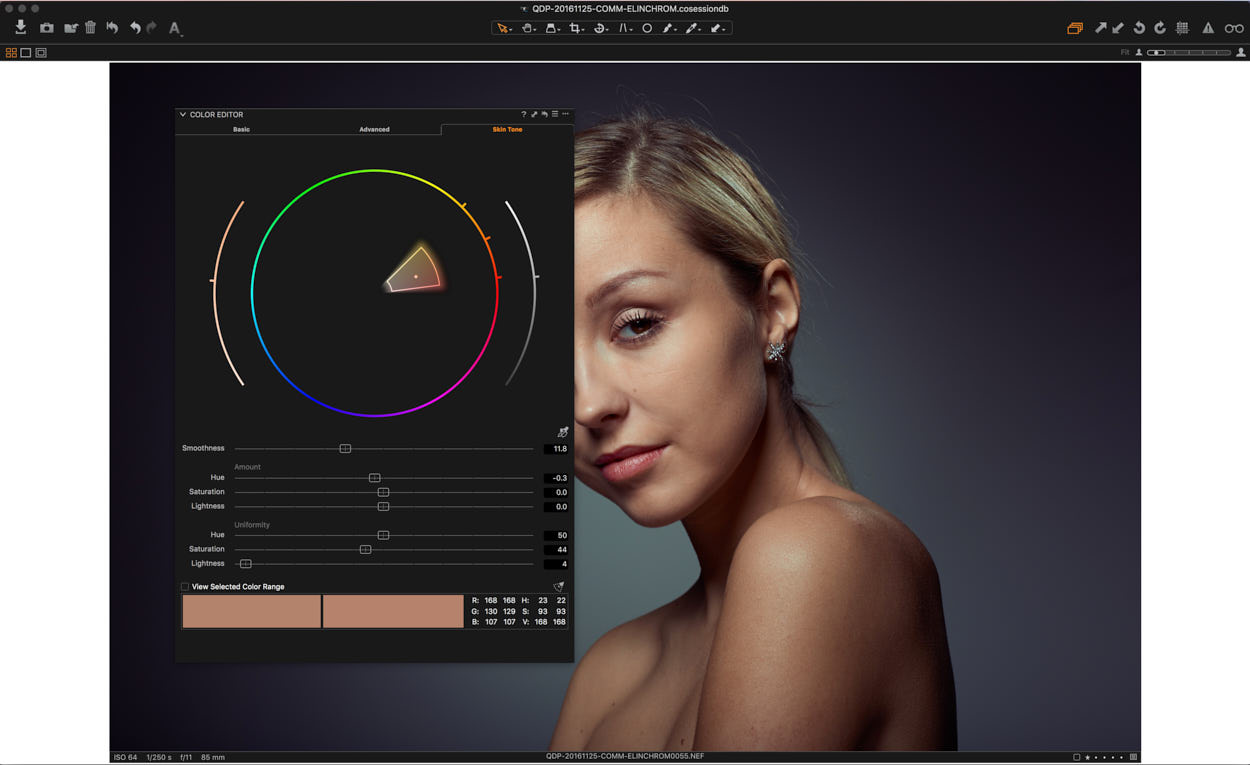
Only with Capture One do I manage to get the colors I want out of my RAW files without spending too much time. The easy use of the Color Editor and Skin Tone Tab allows for extremely accurate adjustments! Every time a client requires different software to process the RAW files, I miss Capture One’s Color Editor Tool. It’s such a time saver, and diminishes the work you need in Photoshop quite a lot.
Even better yet, I haven’t had to buy an expensive color target to obtain the colors I want. The ICC profiles, created by Phase One for over 400 cameras, are stellar and can easily be tweaked to one’s liking. Get your white balance right, and your colors will look more realistic than ever, even with the default settings.
#3 Good Out of the Box, Great Once Customized
Capture One offers great settings right out of the box. When I switched from Lightroom, I was astonished to see the difference between my files in Capture One and Lightroom! They look so much better in Capture One, without adjusting anything. Consequently, I decided to leave Adobe’s product behind. The Capture One look, just like the medium format look, is something truly special. You have to try it to understand it.
Once you get accustomed to Capture One and its tools, you should tailor your interface. I see so many photographers using the software just as it is even though they don’t use half of the features and don’t know about others far more important.
The level of customization is above anything else I’ve seen: you can personalize almost everything. It’s by making your own workspace that you’ll be able to go through pictures extremely quickly and efficiently, without feeling restricted by the interface. You’ll take your RAW files to the next level without losing time.
#4 Lightning Fast
At first, Capture One may be intimidating because of all its tools. But once you make your own workspace and customize everything you can, you’re able to work faster than ever. Not just because you know the ins and outs of the software, but also because it’s built to operate with big files and for large jobs.
Most other RAW processing apps were built to process pictures from a 10-year-old 35 mm digital camera with a 15 megapixel sensor or less. The power needed isn’t the same as what 50+ megapixel files now require.
Capture One is designed to work with digital medium format cameras that produce large RAW files, so it is not an issue at all to develop pictures from a Nikon D810 or Canon 5DSR. I mean, it can process 100 megapixel files without slowing down, as long as your computer can handle it.
If you’re used to Capture One 8 or 9, you need to give Capture One 10 a try. It’s even faster, thanks to the software engineers who reworked the main tools to make them more efficient. Panning, zooming, or going from one RAW file to another is instantaneous, no matter how big the images are!
#5 Focus Mask
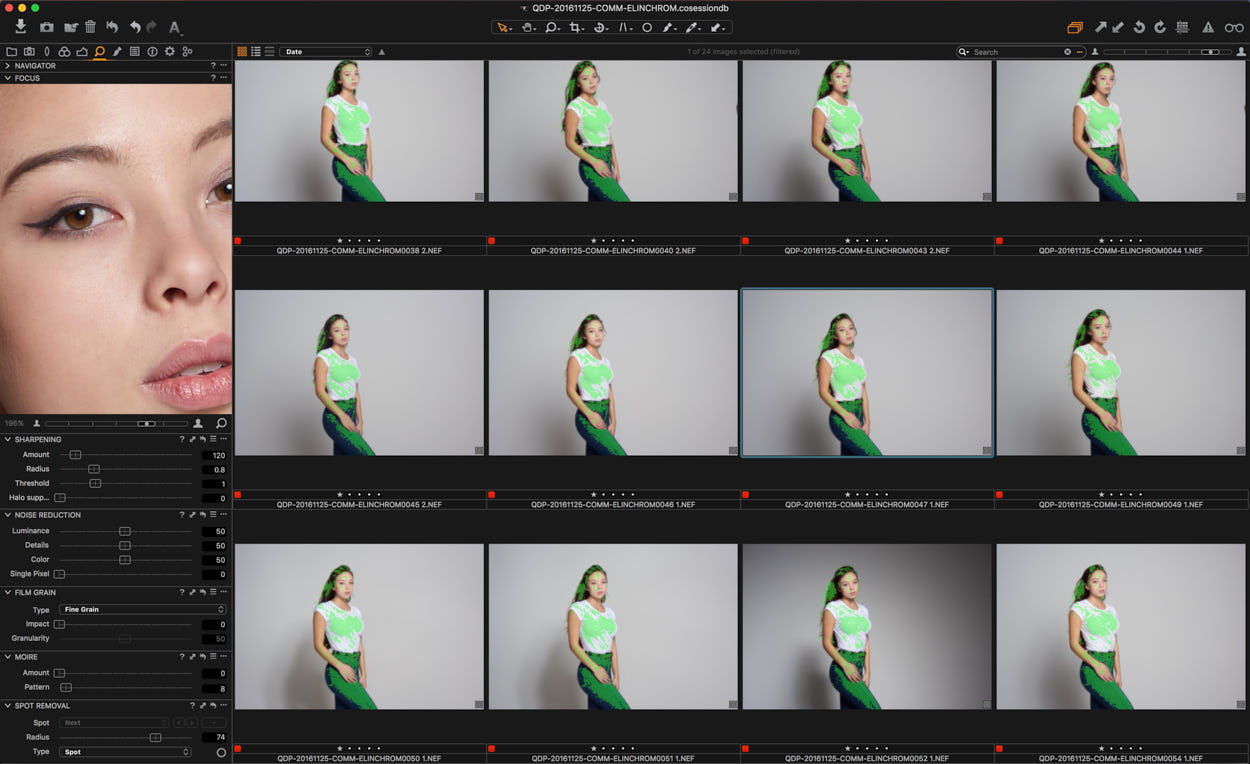
Wedding or commercial photographers sometimes have to go through quite a lot of pictures quickly to keep their business profitable. One issue when culling down files is that you can’t select them using the thumbnails only as you can’t check focus properly this way.
Well, with Capture One it’s actually possible! The Focus Mask Tool displays an overlay color where the focus is achieved. No need to zoom in on every single frame, just the ones you aren’t sure about. Even then, you can use the Focus Tool to keep the navigator view but still check focus accuracy on your file. Culling has never been easier than with Capture One.
#6 Color Toning Made Visual
When teaching retouching, I find that many struggle with the notion of color. Using curves when you don’t know anything about color theory is awkward and anything but intuitive. Removing green to add magenta, go figure it out…
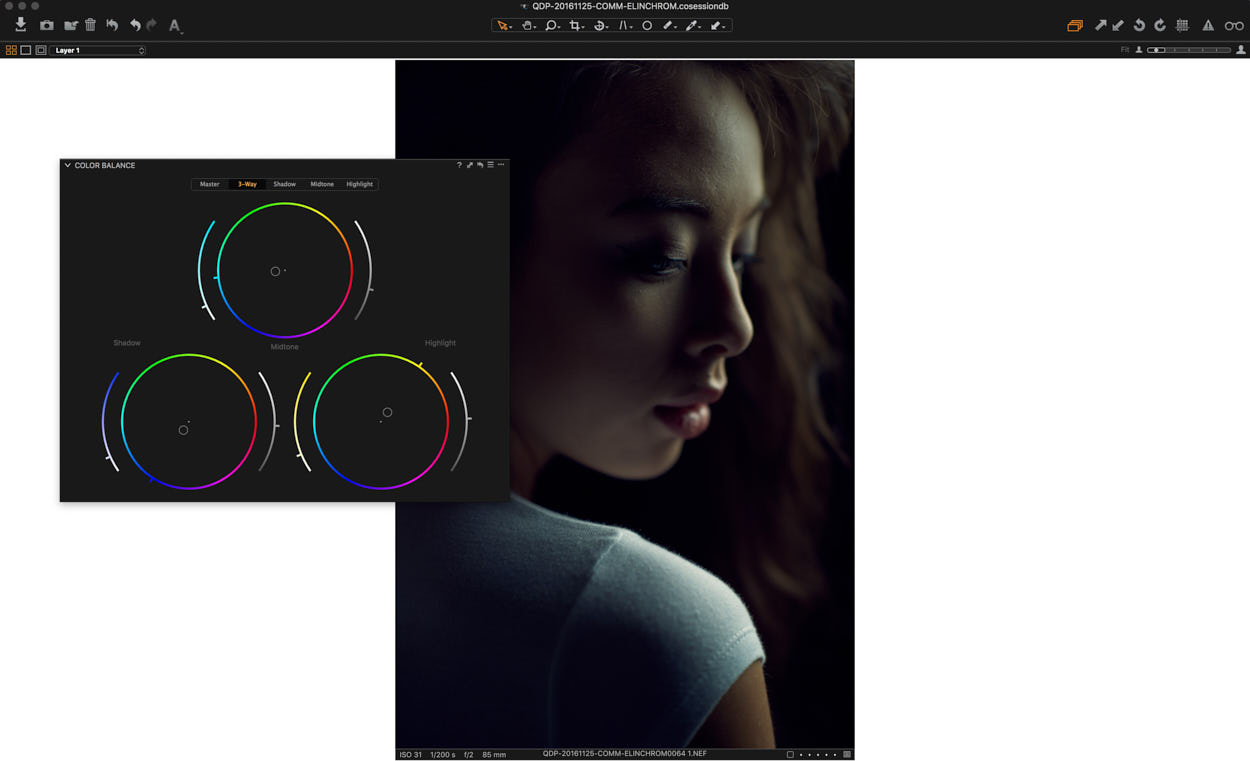
Anyone who ever opened a video color corrector software has probably seen the color wheels they feature to adjust the colors. Until Phase One introduced it in Capture One, no other photo-editing software offered this! It’s such a powerful and easy to use tool, that one can only wonder why it wasn’t available in any other photo editing software before. Once you try it, it’s extremely hard not to use it.
Adjusting color according to luminosity levels is so intuitive that even beginners will achieve the results they have in mind.
#7 Multiple Exports at Once
I remember when I used Lightroom and the export process could be a pain when exporting in multiple formats. When I shot weddings, I wanted to export 8×12” files at 240 DPI for my clients, full resolution at 300 DPI for my archives, and have 120% TIFFs at 300 DPI in 16 bits for wall prints and album design. To avoid extremely slow processing, I wait for one export to finish before I launch the next.
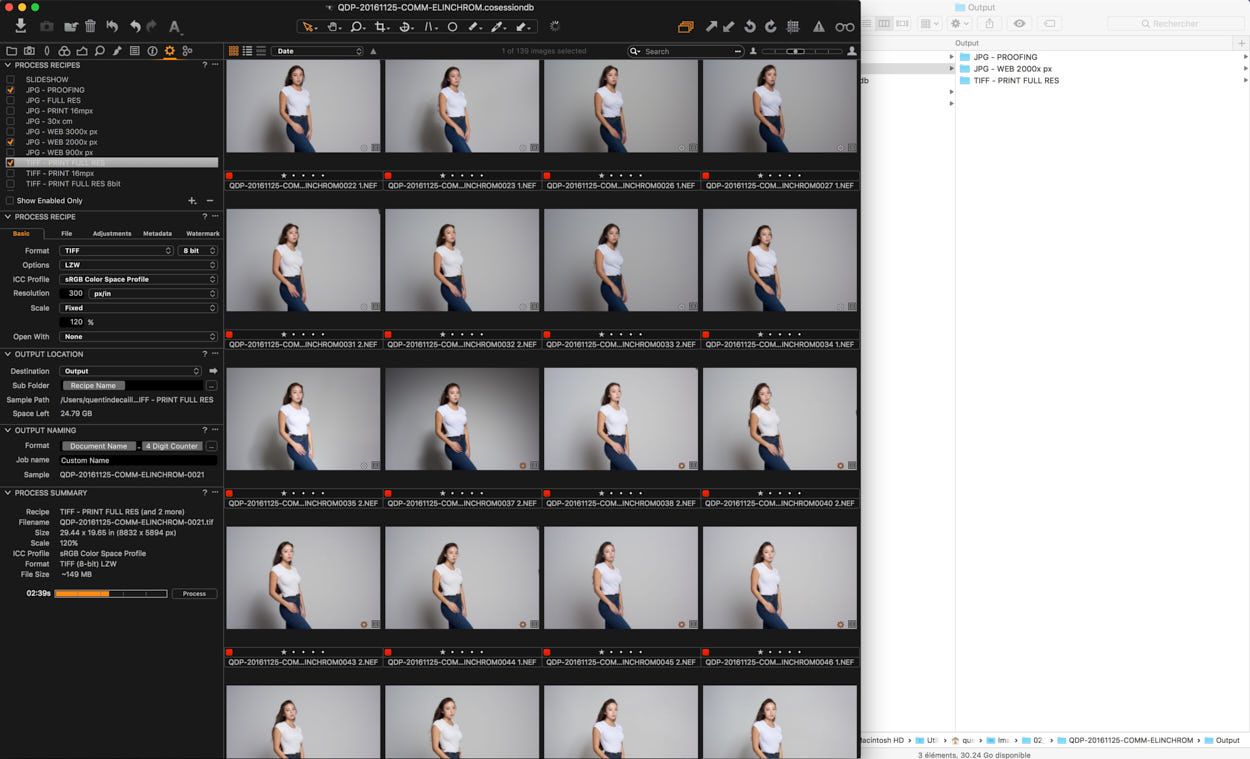
Capture One is designed to launch multiple recipes (export presets) at once. So, exporting JPEGs for proofing while the TIFFs are being processed is no longer an issue. The software does the work for me once I select the recipes.
#8 Capture Pilot
Any commercial photographer has probably worked with an art director looking over his shoulder to get a glimpse at the camera’s back. Tethered shooting becomes more efficient with Capture Pilot running on an iPad alongside Capture One on a computer. By using Capture Pilot, the art director can quickly go through the files as they’re captured. Meanwhile, the digital assistant can work in Capture One on the computer, adjusting the files on the fly.
Also family and portrait photographers can benefit from Capture Pilot. Instead of sending a proof gallery, simply hand over an iPad at the end of the session, and let your client(s) choose their images. It’ll make your work easier and they’ll most likely pick more shots as they’ll make an emotional rather than a rational decision.
#9 Proofing Taken to the Next Level
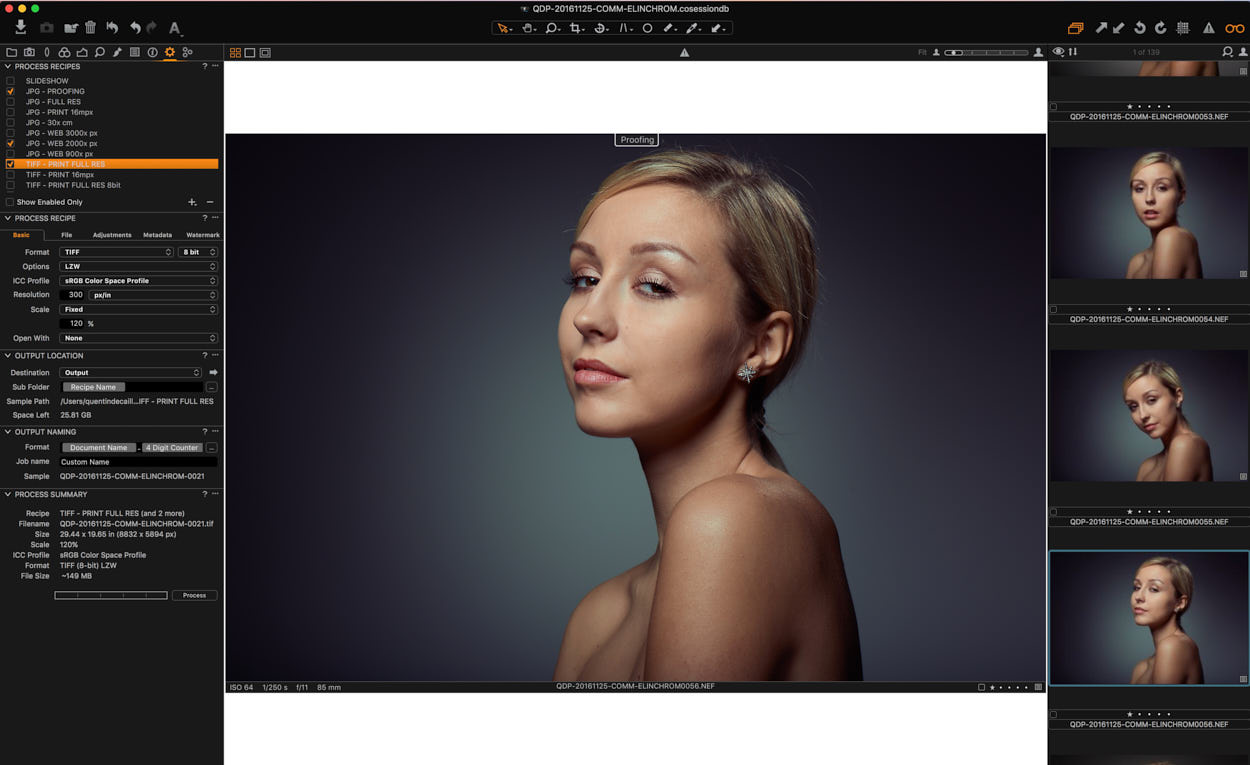
Proofing has become a forgotten step in many photographers’ workflows nowadays. As our industry has changed and digital use only has become a thing, many don’t proof their files anymore. But proofing isn’t limited to making sure the file looks perfect once printed. Most photo editing software can do that, Capture One being one of them. However, Capture One 10 offers a brand new feature allowing you to proof a file according to the process recipe selected.
This effectively means that Capture One 10 will display a proof of the picture with the settings the recipe has. No need to guess the effect of the JPEG compression or of the scaling on the sharpness accentuation anymore. The proof looks exactly like the final exported file.
#10 Sharpening for Final Use
This new feature of Capture One 10 has to be one of my favorite ones! Many photographers tend to add sharpening to their images in Photoshop using some kind of high pass filter trick. That works great, but saving the file with added sharpness isn’t such an excellent idea when the final use hasn’t been defined or if the file will be used on different media. Your picture may need different sharpening for Facebook than it does for a fine art print or a billboard.
When exporting, Capture One 10 offers the choice between adding sharpness for print, screen, or none at all. The last option is ideal for retouching. Better yet, sharpening for print has a handy feature named “Distance”. It lets you define the viewing distance of your print, so that sharpening is applied accordingly. With this feature, you don’t have to guess if your file is sharp enough for a 5-meter-wide image.
And there you have it, my top ten reasons why I’m not looking at any other RAW processing software alternative. Capture One is what suits my needs best, and I customize it to make my workflow as efficient as possible. And I’m extremely excited about Capture One 10!
While I mentioned a few of the newest features here, the new release has so much more to offer. Whether you’re a Capture One user or not, you must give it a try and experience its speed and handy new features.
… And before I leave you with the free 30-day trial, here’s a bonus 11th reason why you should consider Capture One: free tutorials and webinars. No need to pay to become a Capture One expert. Just head over to Phase One’s YouTube channel to watch videos in seven different languages. If you want to go more in depth, there’s always the Image Quality Professor’s blog posts.
Quentin Décaillet
Quentin Décaillet is a product and beauty photographer based in Switzerland. His endless curiosity and hunger for learning new things have led Quentin to create a unique paradoxical visual style. Bold, contrasty, and vivid, his imagery is a combination of his deep passion for art and technology. When Quentin is not working on a project, you’ll most likely find him trying new techniques to push his art further.

Great article. My only cons of Capture One so far are:
– no way of changing the menus colour. Everything is extremely black (apart from the viewer). When combining this with the super small fonts, it becomes hard to work for more than an hour
– no compare before/after with a single shortcut
– no adjustment checkmarks to see how the photo looks without the edited adjustment with a single click. I know you can option-click the arrow, but it is very awkward to use
– no option to create a new user collection when importing. You have to remember to create it first and select it before inserting the memory card or invoking the import window
– no option “do not import duplicates” on the import window
– no way of zooming in and out an image with a single shortcut (i.e. Z). You have to set two.
– no trackpad support for Macs – swiping for cycling photos, pinch to zoom, double tap to zoom…
If these are implemented, Capture One will become the best photo processing and organising application!
Hi Stefan,
Thanks for taking the time to give your input!
We can’t comment on what maybe coming in the future but its always useful to hear what people want / need.
Thanks again!
After working with almost all available raw photosoftware I made a testdrive with Capture One. After one day I was in love with it. Best photo processing software on this moment. Definately going to buy it After my trial periode is over.